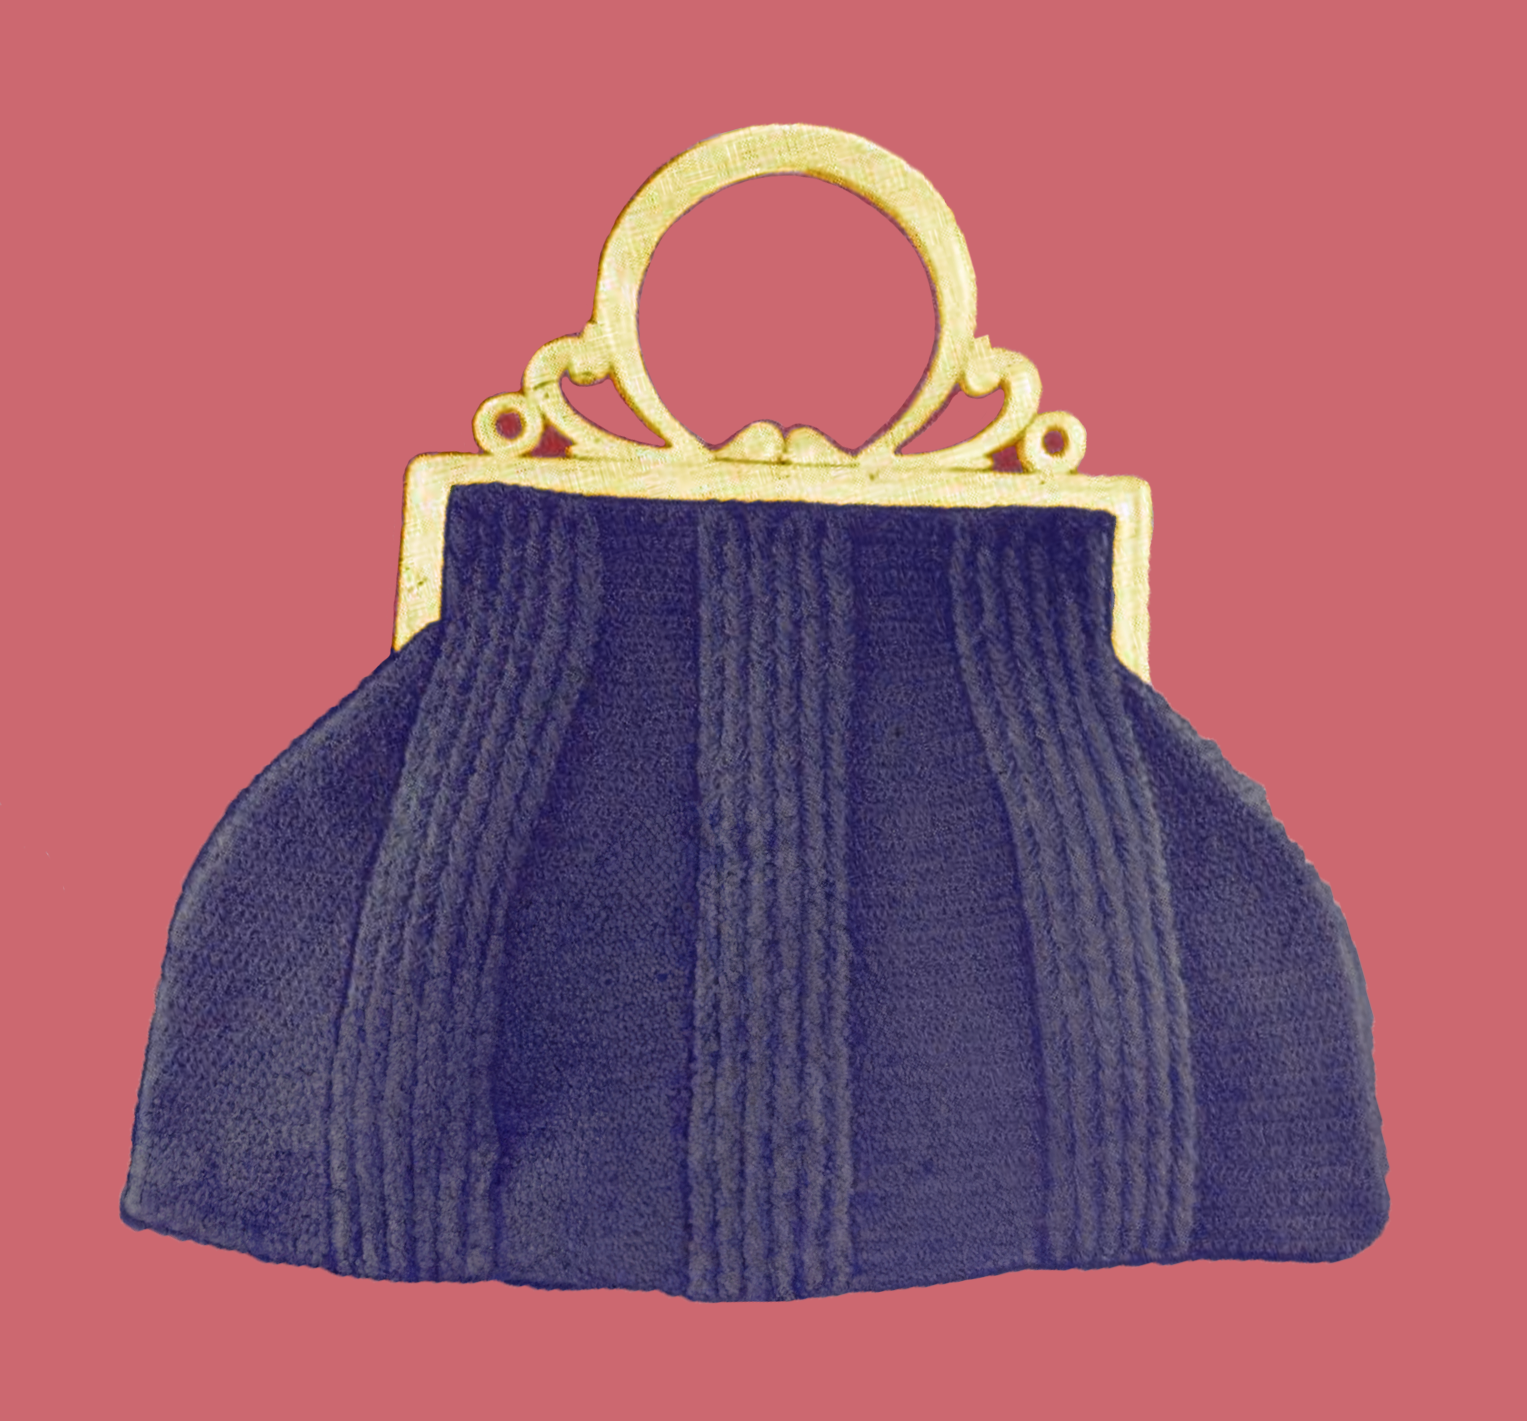

Lady Gloria Bag Crochet Pattern
The Lady Gloria Bag is a sophisticated and timeless design that captures the elegance of vintage fashion. With its intricate cable stitch detailing and refined silhouette, this bag is a statement piece that exudes both style and craftsmanship. Perfect for special occasions or adding a touch of glamour to your everyday look, the Lady Gloria Bag is as functional as it is beautiful, offering ample space for your essentials while maintaining its chic aesthetic.
One of the standout features of this pattern is the cable stitch, which creates a rich texture and adds depth to the bag’s design. The stitch pattern not only enhances the visual appeal but also provides durability, ensuring the bag retains its structure and shape over time. Paired with a classic hinge frame, the Lady Gloria Bag embodies the charm of vintage accessories while remaining practical for modern use. The addition of lining and a secure frame makes it a reliable option for carrying your belongings with confidence.
Whether you’re looking for a rewarding crochet project or a thoughtful handmade gift, the Lady Gloria Bag is an excellent choice. Its timeless design appeals to crochet enthusiasts of all skill levels who appreciate the beauty of vintage patterns. With its elegant texture and versatile style, this bag is sure to become a treasured accessory, blending nostalgic charm with modern functionality.
Discover more timeless designs from this vintage collection by exploring Bags and Hats Crocheted with Raphael Brand Gimp No. 5 (1939), where you’ll find all the patterns from this classic booklet.
This pattern is transformed, adapted, and expanded from a public domain design originally published in Bags and Hats Crocheted with Raphael Brand Gimp No. 5 (1939). While the original design is in the public domain, the rewritten instructions and supplementary content on this site are ©Tiffany Bliss Mullins, 2024. All rights reserved. Have questions about this pattern, public domain, or copyright? Visit the FAQ page for answers and resources.
Key Details
- Skill Level: Intermediate
- Stitches Used: Single Crochet (SC), Cable Stitch
- Finished Size: Adjustable based on frame size
Materials
- Gimp: 8 tubes of “Raphael Brand Gimp” (or a modern substitute). You can read more about gimp and modern substitution suggestions here: What is Gimp?
- Lining fabric (about ½ yard recommended)
- Hinge Frame: Size to fit the finished width of your bag.
- A 6- to 8-inch frame is typically suitable, depending on your gauge and yarn substitution.
- Crochet your panels first and measure the top edge to choose the appropriate size.
Special Stitch
Cable Stitch (CBL ST):
- Yarn over, insert the hook into the specified stitch, yarn over and pull through.
- Yarn over, insert the hook into the same stitch, yarn over and pull through.
- Repeat the process once more (you will have 7 loops on your hook).
- Yarn over and pull through all 7 loops on the hook.
- Ch 1 to lock the stitch.
- Note: Do not work into the locking chain (ch-1) in subsequent rows.
Pattern
Bag Panels (Make 2)
- Foundation Chain: Ch 50.
- Row 1: SC in the second chain from the hook and in each chain across. Ch 1, turn.
- Row 2: Work 1 CBL ST in the first stitch, skip the next stitch, 1 CBL ST in the next stitch. Repeat from * 4 more times (6 CBL STs in total), SC in the next 8 stitches, 1 CBL ST in the next stitch, and repeat the pattern across the row, ending with SC in the last 8 stitches. Ch 1, turn.
- Row 3: SC in each stitch across. Ch 1, turn.
- Rows 4–10: Alternate Row 2 and Row 3. Ch 9 at the end of Row 10.
- Row 11: SL ST in the second chain from the hook and in the next 7 chains, SC in each stitch across, then Ch 9 at the end of the row. Turn.
- Row 12: SC in the second chain from the hook and in the next 7 chains, 1 CBL ST in the next stitch, and repeat the pattern as in Row 2 across the row, ending with SC in the last 8 stitches. Ch 1, turn.
- Row 13: SC in each stitch across, making 1 increase in each SC section (4 increases total). Ch 1, turn.
- Row 14: SC in each SC and 1 CBL ST around each CBL ST. Ch 1, turn.
- Rows 15–30: Alternate Row 13 and Row 14.
- Rows 31–64: Alternate Row 13 and Row 14, but do not make any increases in Row 13. Fasten off.
Assembly
- Join the two bag panels with SC on the wrong side, starting and ending at Row 12.
- Insert and sew in the lining.
- Attach the bag to the hinge frame securely, ensuring a neat finish.
Finishing
The Lady Gloria Bag is a stunning example of vintage craftsmanship brought into the modern age. Its elegant texture and structured design make it a show-stopping accessory for formal events or everyday sophistication. Enjoy creating this timeless piece and sharing your unique handmade creation with the world!


