
Ripple Bag Crochet Pattern
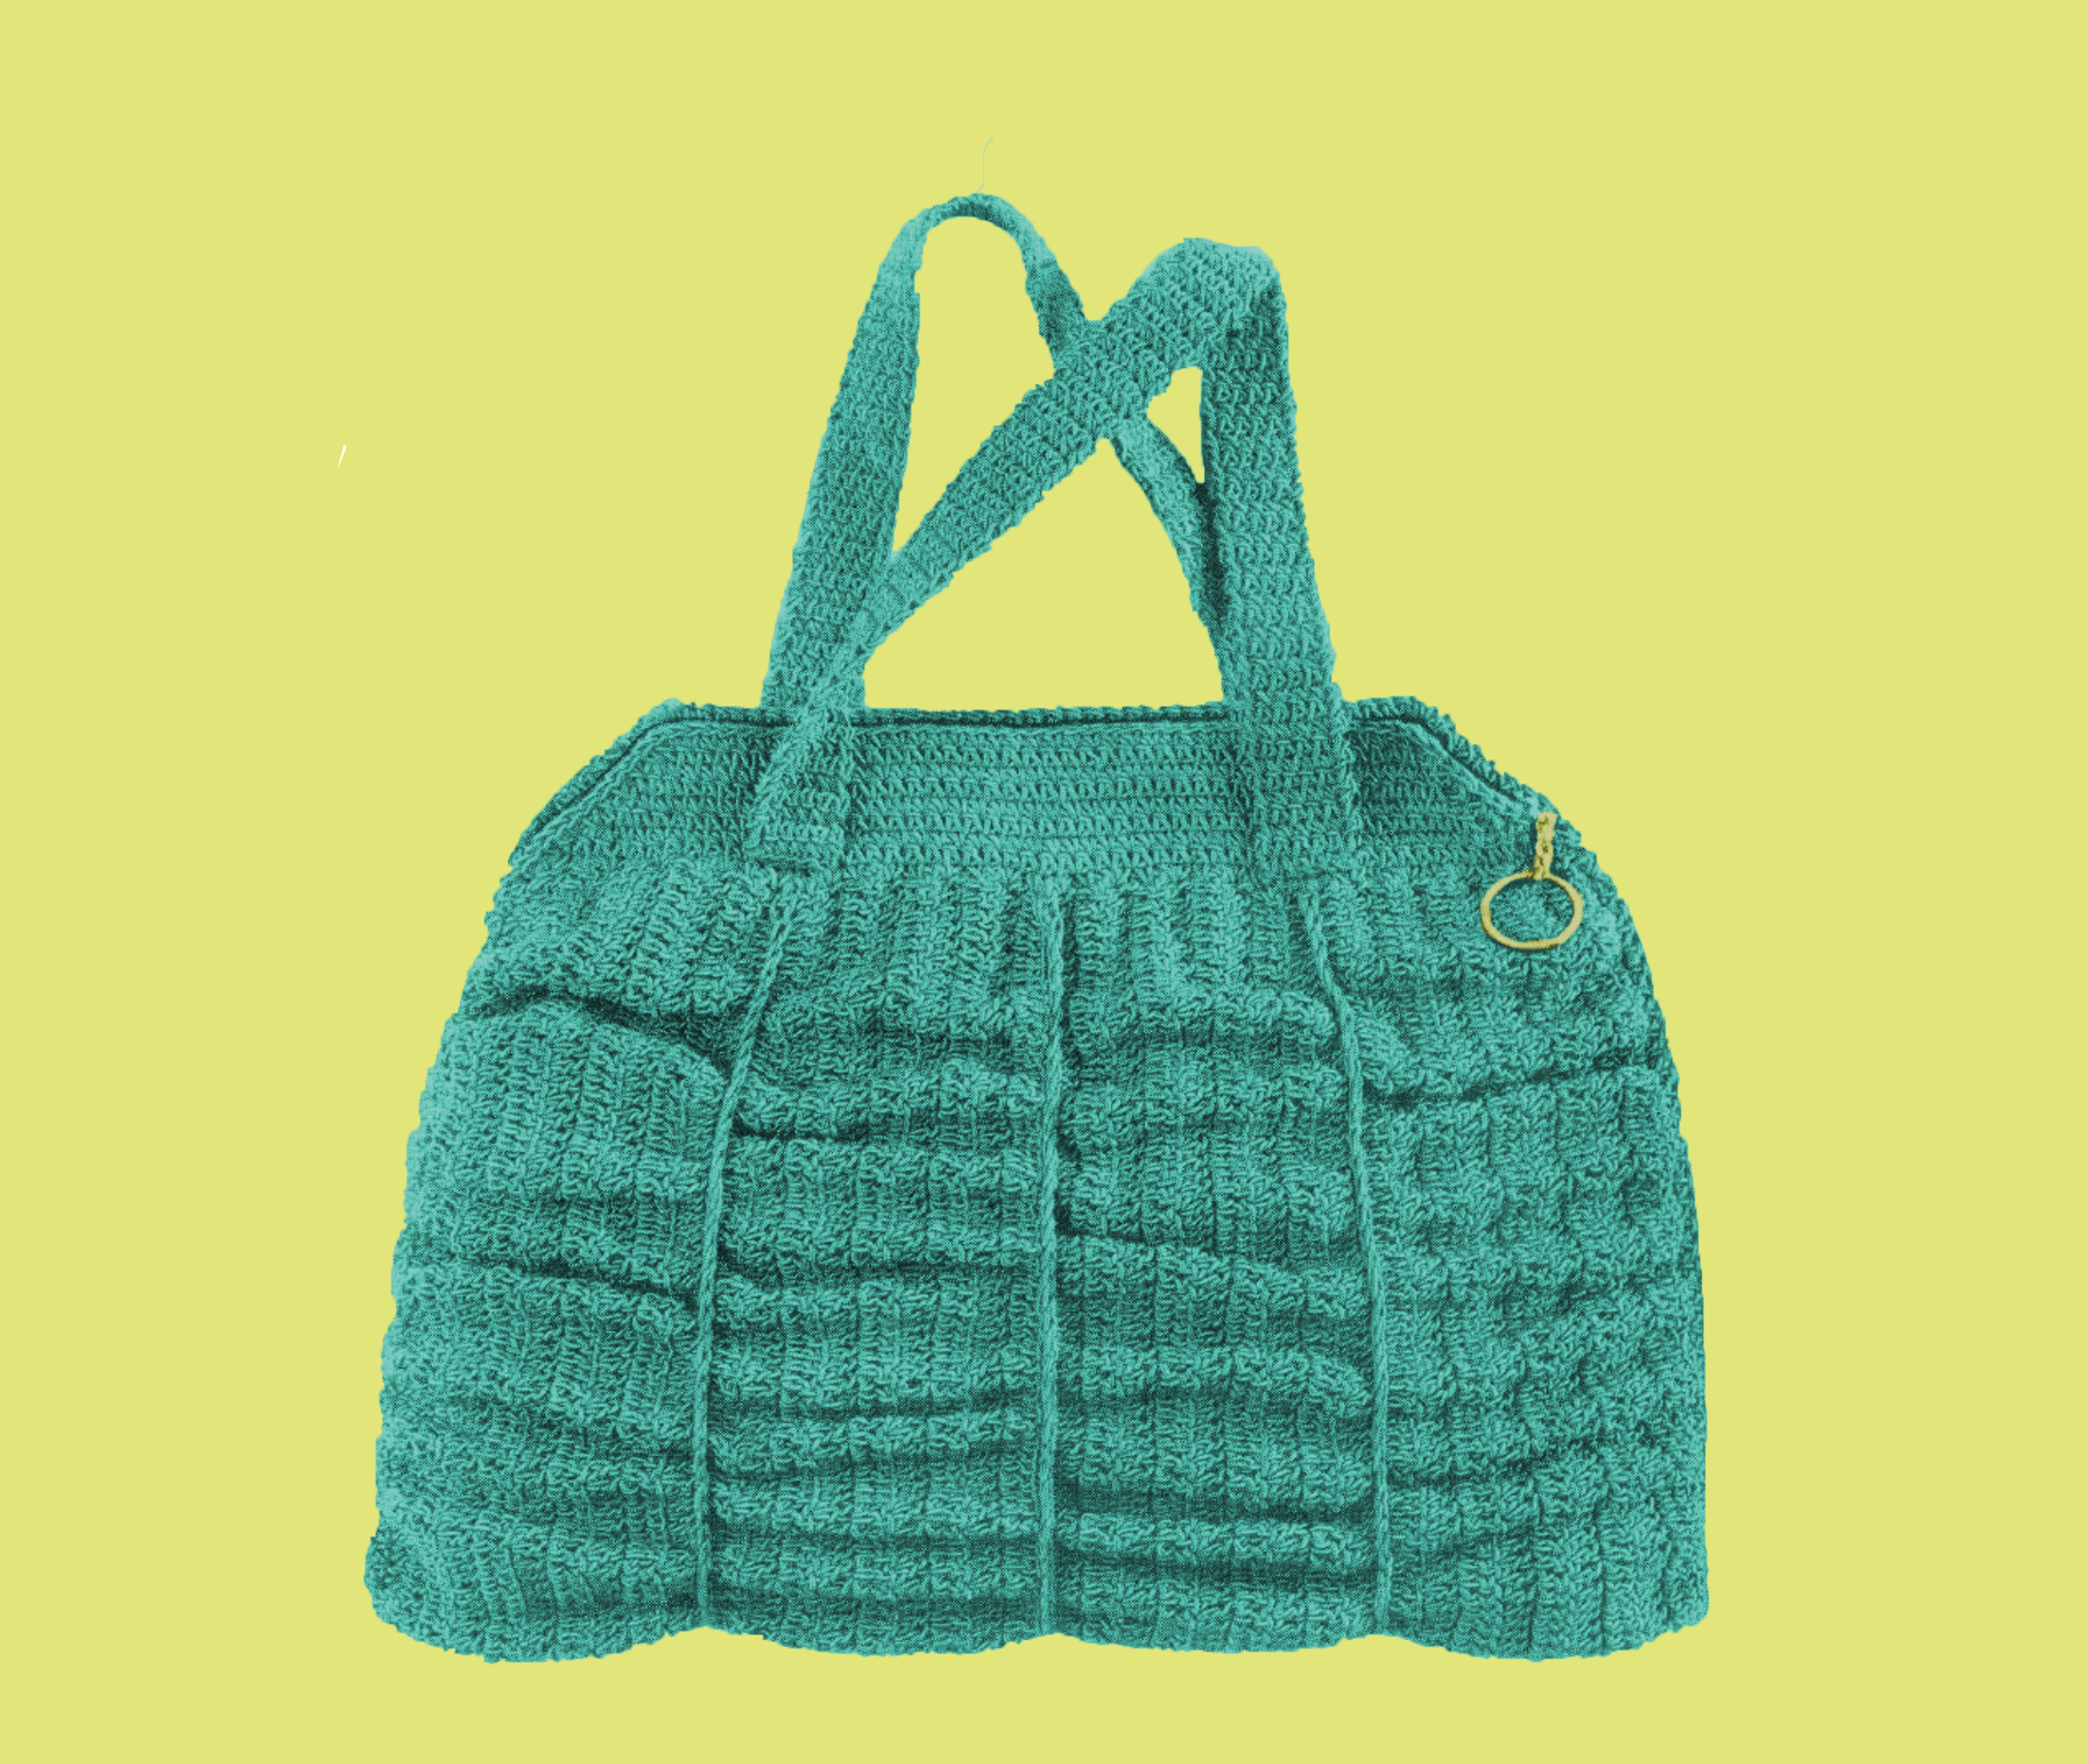
The Ripple Bag Crochet Pattern is a stunning vintage design that blends texture and functionality into a truly unique accessory. The bag’s rippled texture, created through alternating rows of front- and back-loop double crochet stitches, adds a dynamic, wave-like design that catches the eye. This timeless pattern also incorporates structured gussets and a sturdy base, ensuring durability while maintaining its elegant appearance. The Ripple Bag is a perfect combination of practicality and vintage charm, making it a delightful project for crocheters who love crafting accessories that stand out.
While this pattern offers some challenges, they are easily mastered with a bit of focus and practice. The rippled texture requires attention to detail and consistent tension, but once you become familiar with alternating between front- and back-loop stitches, the process becomes rhythmic and enjoyable. The gussets and base add structure to the bag and involve shaping and joining techniques that may seem complex at first, but the step-by-step instructions make them straightforward to follow. The inclusion of rustproof wire might be new for some crocheters, but with a little patience, working it into the design becomes a simple and rewarding process.
The Ripple Bag is a wonderful project for crocheters who enjoy learning new skills while creating something both beautiful and functional. The unique texture, combined with the sturdy construction, makes this bag a standout accessory that’s perfect for any occasion. Whether you’re crafting it for yourself or as a thoughtful gift, this pattern offers a chance to expand your skills and create a timeless, handmade piece you’ll be proud to show off. With a little determination and creativity, the Ripple Bag is a rewarding project that highlights the artistry of vintage crochet.
Discover more timeless designs from this vintage collection by exploring Bags and Hats Crocheted with Raphael Brand Gimp No. 5 (1939), where you’ll find all the patterns from this classic booklet.
This pattern is transformed, adapted, and expanded from a public domain design originally published in Bags and Hats Crocheted with Raphael Brand Gimp No. 5 (1939). While the original design is in the public domain, the rewritten instructions and supplementary content on this site are ©Tiffany Bliss Mullins, 2024. All rights reserved. Have questions about this pattern, public domain, or copyright? Visit the FAQ page for answers and resources.
Key Details
- Skill Level: Intermediate
- Stitches Used: Slip Stitch (SL ST), Single Crochet (SC), Double Crochet (DC)
- Finished Size: Adjustable
Materials
- Gimp: 6 tubes of “Raphael Brand Gimp” (or a modern substitute). You can read more about gimp and modern substitution suggestions here: What is Gimp?
- Lining fabric (recommendation: about ½ yard)
- 1 coil of cotton wrapped rustproof wire
- Slide fastener
Pattern
Bag Body
- Foundation Chain: Ch 147.
- Row 1: DC in the third chain from the hook and in each chain across. Ch 2, turn.
- Rows 2–9: DC in each stitch across. Ch 2, turn.
- Row 10: DC in each stitch across, working in the front loop only. Ch 2, turn.
- Rows 11–18: DC in each stitch across. Ch 2, turn.
- Row 19: DC in each stitch across, working in the back loop only. Ch 2, turn.
- Rows 20–27: DC in each stitch across. Ch 2, turn.
- Row 28: DC in each stitch across, working in the front loop only. Ch 2, turn.
- Rows 29–36: DC in each stitch across. Ch 2, turn.
- Row 37: SC in every other stitch of the previous row. Fasten off.
- Bottom Edge: Attach Gimp to the foundation chain and SC in every other chain across. Fasten off.
Gathered Sections
- Attach Gimp to the right side of Row 9 and SL ST into every other remaining loop across. Fasten off.
- Repeat for Rows 18 and 27.
Foundation Top
(To be worked on each end of the bag.)
- Row 1: Attach Gimp to the right side of one end of the bag. SC evenly along the edge as follows:
- SC in the end of the first row, 2 SC in the end of the next row, 1 SC in the end of the next row. Repeat from * to the end (54 stitches). Ch 1, turn.
- Rows 2–8: Insert wire for structure and work over it. Skip the first stitch, SC in each stitch across, decreasing 1 stitch at the end of each row as follows:
- Insert hook into the next-to-last stitch, pull through, insert hook into the last stitch, pull through, yarn over, and pull through all 3 loops on the hook. Ch 1, turn.
- Fasten off.
Assembly
- Fold the piece in half. Join the sides below the foundation top using SC on the right side.
- Work one row of SC around the entire opening of the bag for a clean edge.
- Sew the slide fastener and lining into the bag.
Handles
- Foundation Chain: Ch 6.
- Row 1: SC in the second chain from the hook and in each chain across. Ch 1, turn.
- Rows 2 and Onward: SC in each stitch across until the handle measures 11 inches in length. Fasten off.
- Make a second handle identical to the first.
- Sew the handles to the bag securely as shown in the original illustration.
Finishing
Once the handles are attached and the lining is sewn in, your Ripple Bag is ready to use! The gathered details and structured foundation make it a stunning addition to your handmade accessories collection.
Enjoy creating your Ripple Bag, and don’t forget to share your finished piece with the crochet community! 


