
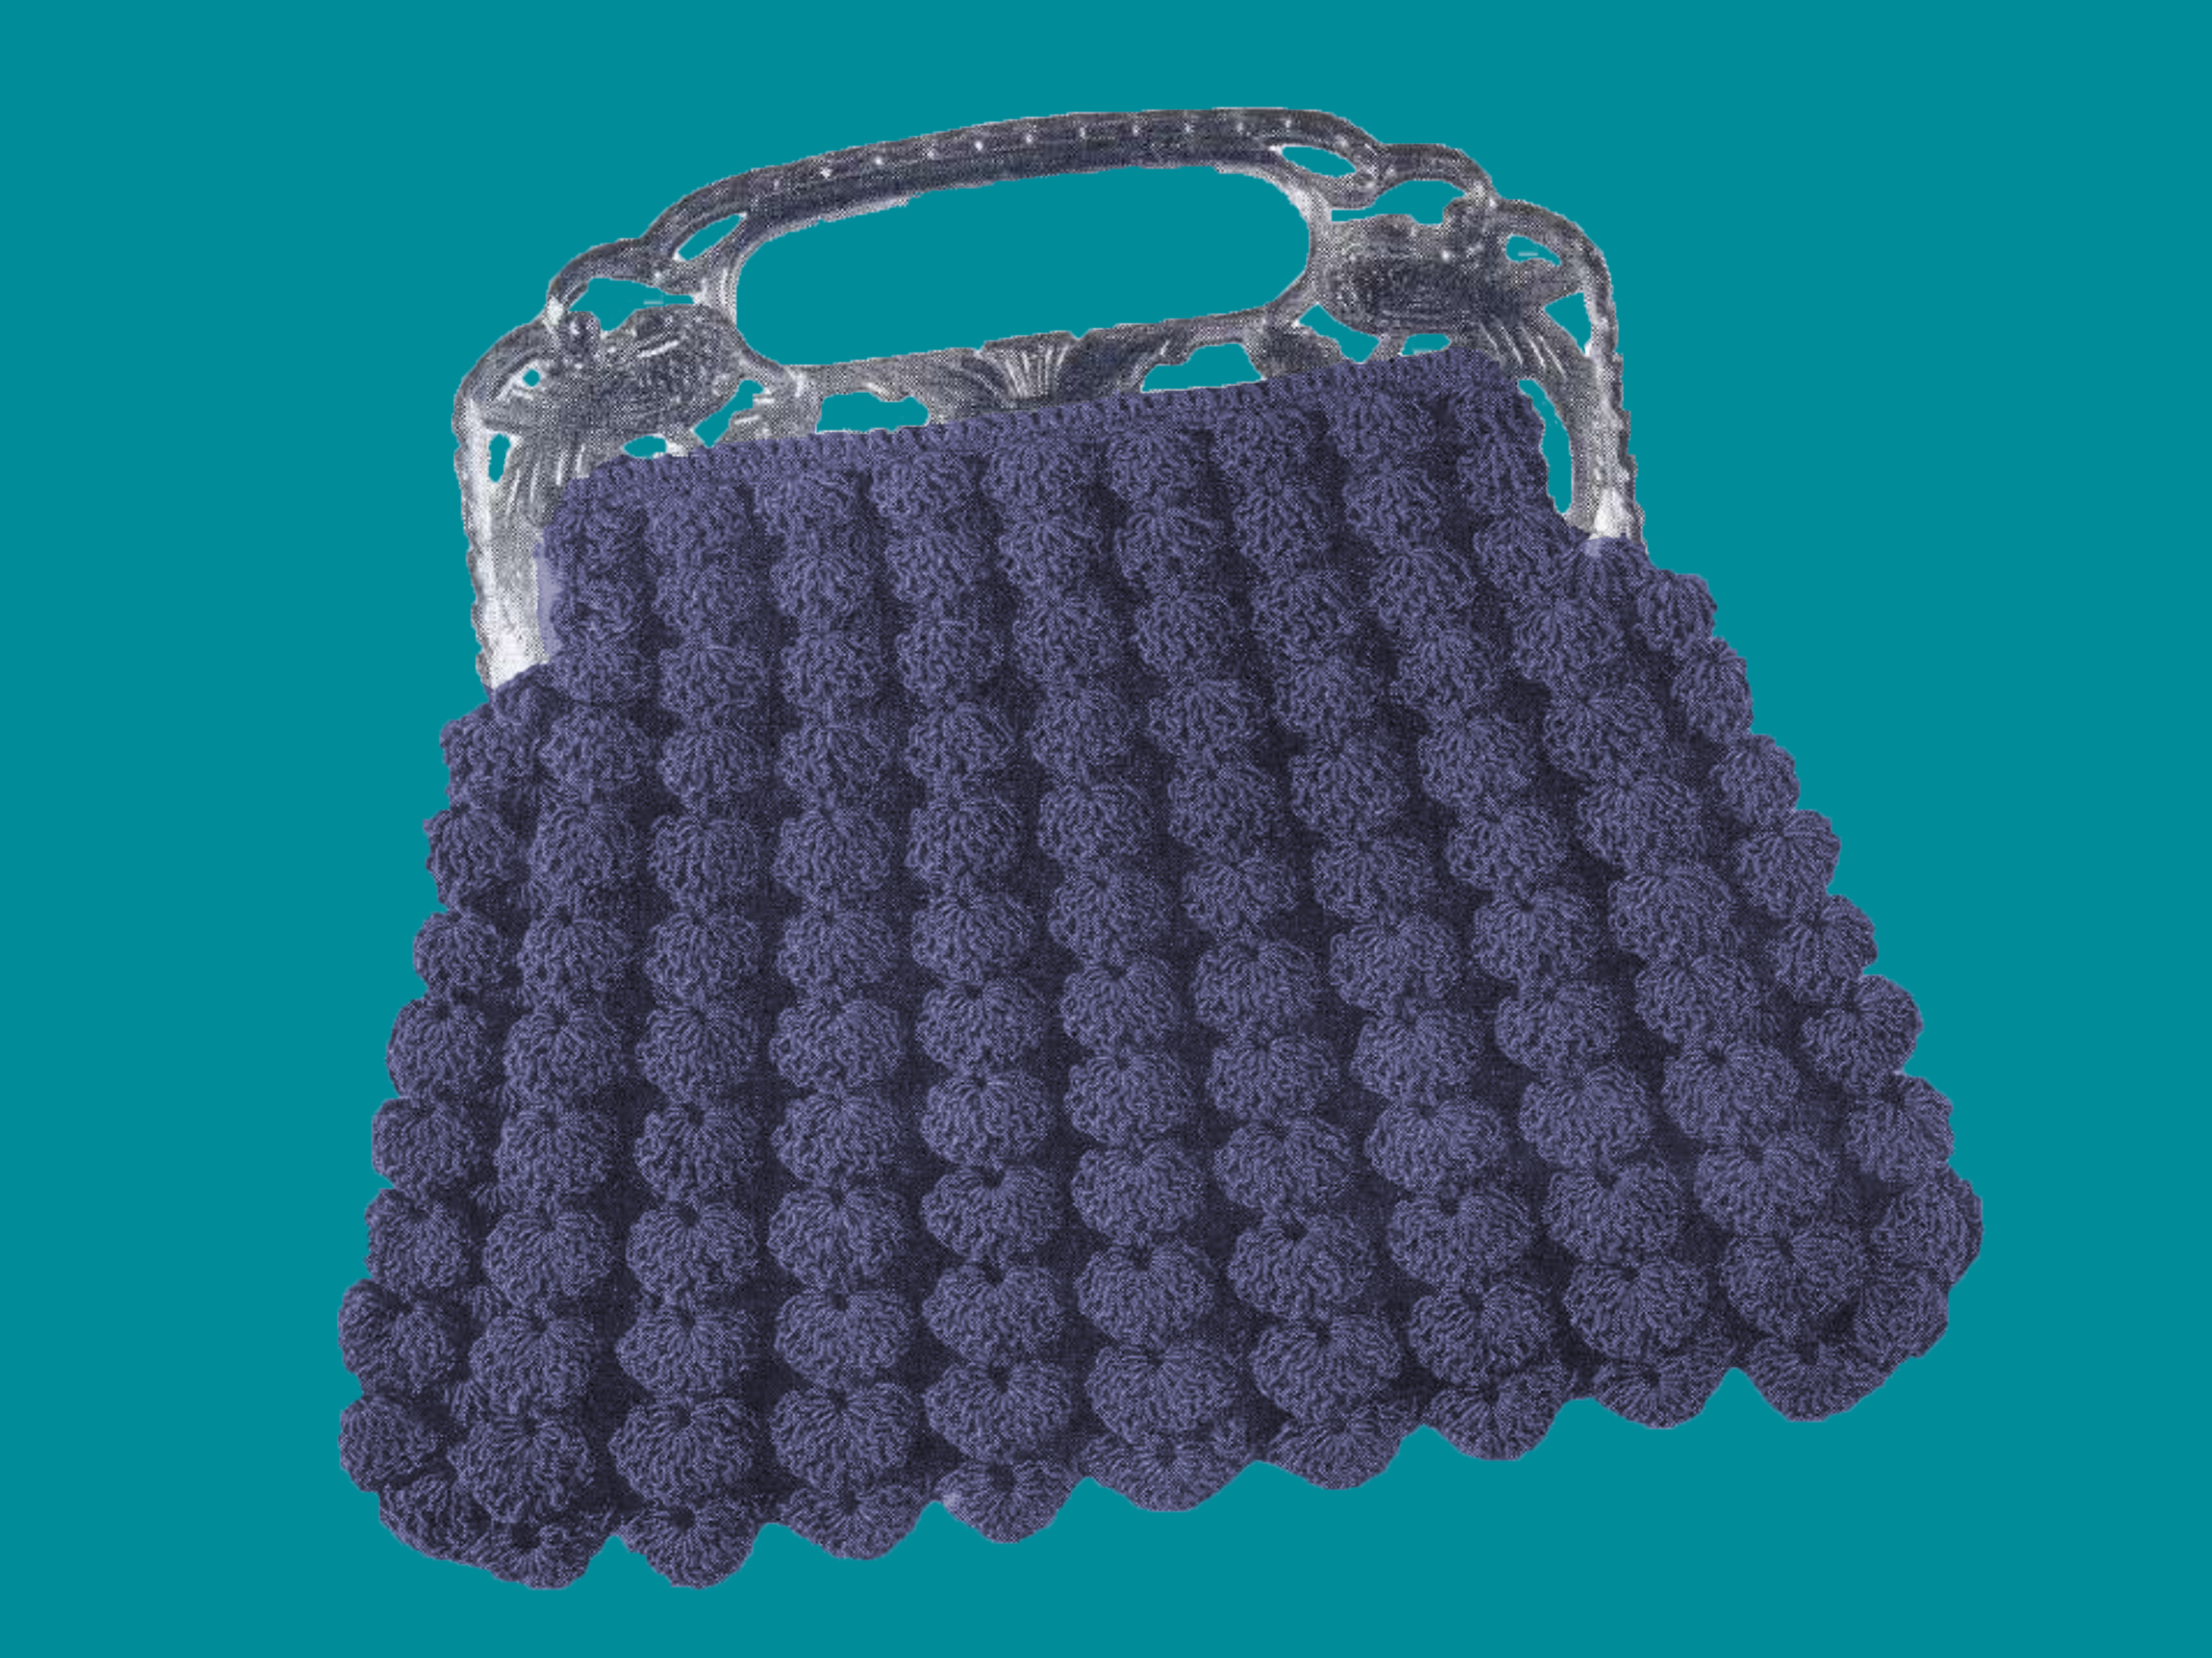
Frame Shell Bag Crochet Pattern
The Frame Shell Bag is a vintage crochet masterpiece that beautifully combines elegance and texture. Its standout feature is the intricate shell stitch, which creates a visually striking design with a graceful scalloped texture. The bag’s timeless charm is accentuated by its structured hinge frame, offering both a polished appearance and secure functionality. Perfect for evening outings or as a statement accessory, the Frame Shell Bag is a delightful project for crocheters who enjoy blending classic design elements with practical utility.
This pattern is moderately challenging, making it ideal for intermediate crocheters or adventurous beginners ready to expand their skill set. The repetitive nature of the shell stitch is straightforward once mastered, but the careful shaping and consistent tension required to create the bag’s structure can be a bit demanding. Additionally, working with a hinge frame requires precision to ensure the finished bag aligns perfectly for attachment. However, the process is incredibly rewarding, and the detailed texture of the shell stitches makes the effort worthwhile.
For those who love vintage crochet patterns, the Frame Shell Bag offers a wonderful balance of challenge and creativity. The repetitive rhythm of the shell stitch provides a meditative quality, while the construction process, including shaping the bag and attaching the frame, adds an element of technical accomplishment. The finished piece is not only functional but also a beautiful testament to the craftsmanship and artistry of handmade crochet. Whether as a personal accessory or a thoughtful gift, the Frame Shell Bag is a project that’s sure to be cherished.
Discover more timeless designs from this vintage collection by exploring Bags and Hats Crocheted with Raphael Brand Gimp No. 5 (1939), where you’ll find all the patterns from this classic booklet.
This pattern is transformed, adapted, and expanded from a public domain design originally published in Bags and Hats Crocheted with Raphael Brand Gimp No. 5 (1939). While the original design is in the public domain, the rewritten instructions and supplementary content on this site are ©Tiffany Bliss Mullins, 2024. All rights reserved. Have questions about this pattern, public domain, or copyright? Visit the FAQ page for answers and resources.
Key Details
- Skill Level: Intermediate
- Stitches Used: Shell Stitch, Single Crochet (SC)
- Finished Size: Adjustable to match the chosen hinge frame
Materials
- Gimp: 5 tubes of “Raphael Brand Gimp” (or a modern substitute). You can read more about gimp and modern substitution suggestions here: What is Gimp?
- Lining fabric (about ½ yard recommended)
- Hinge Frame: Size to fit the finished width of your bag.
- Because the original 1939 instructions do not specify an exact hinge frame size (and because gimp yarn can vary in thickness), there isn’t a single “official” dimension given in the pattern.
- In practice, most crocheters find that a 6- to 8-inch hinge frame works well.
- For the best fit: crochet your panels first, measure the width of the top edge, and select a hinge frame that matches or is slightly wider.
Special Stitch
Shell Stitch:
- Work 6 treble crochets (TR) into the same stitch to make one shell.
- To increase the shell size: work 8, 10, or 12 treble crochets in the same stitch as specified in the pattern.
Pattern
Bag Panels
- Foundation Chain: Ch 54.
- Row 1: Skip the first 5 chains, work 6 TR into the sixth chain, skip the next 2 chains, SC in the next chain, skip the next 2 chains. Repeat from * across (9 shells).
- Row 2: Ch 2, turn. SC in the center of the shell from the previous row, 6 TR in the next SC, working into the back loop only. Repeat from * to the end of the row, ending with an SC in the center of the last shell. (8 shells)
- Row 3: Ch 3, turn. Work 6 TR into the SC from the previous row (back loop only), SC in the center of the next shell. Repeat from * to the end of the row, ending with 6 TR in the last SC.
- Rows 4–7: Alternate Rows 2 and 3, following the established pattern.
- Rows 8–11: Alternate Rows 2 and 3, increasing each shell to 8 TR.
- Rows 12–15: Alternate Rows 2 and 3, increasing each shell to 10 TR.
- Rows 16–23: Alternate Rows 2 and 3, increasing each shell to 12 TR. Fasten off.
Make a second panel identical to the first.
Foundation Top
- Row 1: Attach Gimp to the foundation chain at the beginning of one bag panel. Work SC evenly across (48 SC). Ch 1, turn.
- Row 2: SC in each stitch across. Fasten off.
Repeat for the second bag panel.
Assembly
- Join the two bag panels with SC on the wrong side.
- Sew the lining into the bag.
- Attach the bag to the hinge frame securely with thread or by stitching through the Gimp for reinforcement.
Finishing
Your Frame Shell Bag is now complete! The structured design and flowing shell stitches create a timeless accessory that is as functional as it is elegant. Enjoy using your handmade bag and share your creation with the crochet community!


