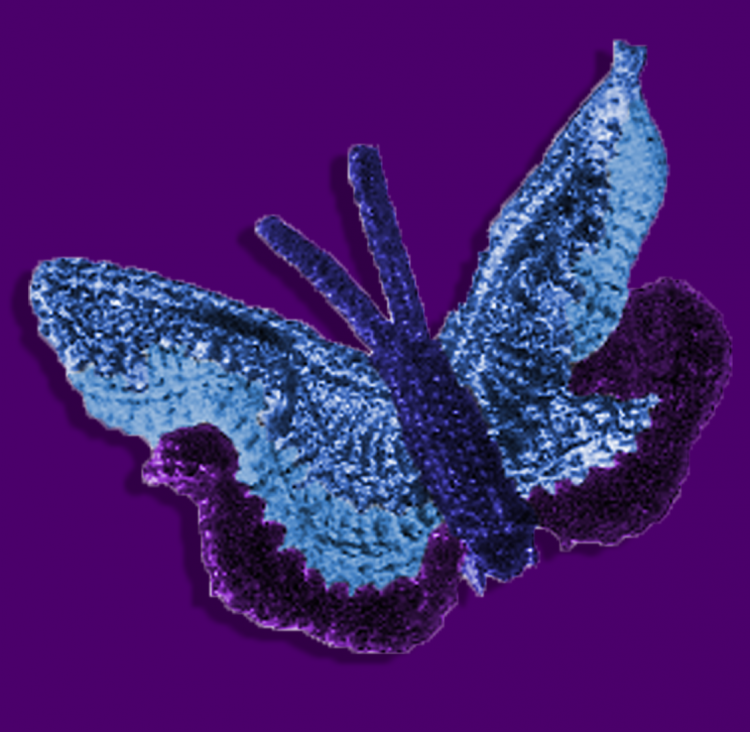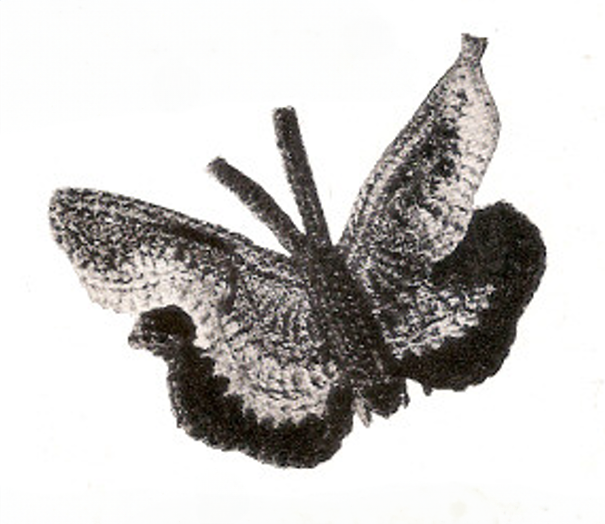

This Crochet Butterfly Hair Clip pattern brings a touch of whimsy and elegance to any outfit, making it a charming accessory for all ages. Featuring delicate wings crocheted with colorful pearl cotton or lightweight yarn, this pattern allows for customization in shades to suit your personal style. The layered design adds dimension, and the use of pipe cleaners for structure ensures the butterfly holds its shape beautifully while providing flexible antennae for added detail.
This vintage pattern includes a combination of textured stitches like single crochets, treble crochets, and double trebles, creating intricate wing shapes that mimic the delicate beauty of a butterfly. The thoughtful finishing touches, including an edging worked over a pipe cleaner for structure and a securely stitched body, ensure the butterfly looks polished and refined. Attaching the completed piece to a hair clip or comb with hot glue makes it both functional and stylish.
Perfect for springtime outfits, special occasions, or as a unique handmade gift, this Crochet Butterfly Hair Clip is an enjoyable project that combines creativity with practicality. Its vintage charm and modern versatility make it a delightful addition to any accessory collection.
About the Images
To help bring this design to life, we’ve included an AI-generated image of the finished pattern alongside the original vintage illustration. The original image highlights the charm and craftsmanship of the vintage design, while the AI rendering provides a detailed and colorized view of how the completed sweater will look. This combination ensures you have both a historical reference and a modern interpretation to guide you in your crafting journey.
This pattern is transformed, adapted, and expanded from a public domain design originally published in Easy to Make Hats, Scarves and Accessories by The Spool Cotton Company Book No. 192 (1943). While the original design is in the public domain, the rewritten instructions and supplementary content on this site are © Tiffany Bliss Mullins, 2025. All rights reserved. Have questions about this pattern, public domain, or copyright? Visit the FAQ page for answers and resources.


Crochet Butterfly Hair Clip
MATERIALS:
- Size 5 pearl cotton: 1 ball each of Turquoise, Pink, and Purple (the pattern originally used J. & P. Coats or Clark’s O.N.T. Pearl Cotton). Or pick different colors to suit your style.
- Alternatively you can use #1 lightweight yarn in each of those colors.
- Steel crochet hook No. 2.
- 2 pipe cleaners.
- A hair clip or small comb.
- hot glue
NOTES:
- Divide each ball of thread in half and use the thread double throughout.
- An alternative to using 2 strands of size 10 crochet thread is to use lightweight #1 yarn. This weight of yarn is similar in thickness to two threads of size 10 crochet thread held together. Be sure to check your gauge and adjust your hook size as needed to ensure the final piece matches the intended measurements of the pattern.
INSTRUCTIONS:
Wings:
- Top Wings (Turquoise):
- Ch 39.
- Row 1: Sc in 2nd ch from hook, hdc in next ch, in next ch work dc, tr, and dc; hdc in next ch, sc in next 2 ch, hdc in next ch, dc in next ch, in next ch work tr, dtr, and tr; dc in next ch, hdc in next ch, sc in next 2 ch, hdc in next ch, dc in next ch, in next ch work tr and dtr; in next ch work dtr, tr, tr, and dtr; in next ch work dtr and tr; dc in next ch. This is the center of the row.
- Work back from the center of the row to correspond. Ch 1, turn.
- Row 2: Sc in the front loop of each st across (54 sts). Fasten off.
- Row 3 (Pink):
- With right side facing, attach Pink in the 4th st from the end. Ch 1, sc in the same place where thread was attached, hdc in the next st, dc in the next st, tr in the next st, dc in the next st, hdc in the next st, sc in the next 2 sts, hdc in the next st, dc in the next st, in the next st work tr, dtr, and tr; dc in the next st, hdc in the next st, sc in the next 2 sts, hdc in the next st, dc in the next st, in the next st work tr and dtr; in the next st work dtr, tr, tr, and dtr; in the next st work dtr and tr; dc in the next st, hdc in the next st, sc in the next st, sl st in the next st (center of the row). Work the other half to correspond. Ch 1, turn.
- Row 4: Sc in the front loop of the first 29 sts, sl st in the next 2 sl sts, sc in the front loop of the next 29 sts. Fasten off.
- Row 5 (Purple):
- With right side facing, attach Purple in the 13th st of the last row. Ch 1, sc in the same place where thread was attached.
- In the next st, work hdc and dc; in the next st, work tr, dtr, and tr; in the next st, work dc and hdc; sc in the next 2 sts.
- Repeat from * once more.
- In the next st, work hdc and dc; in the next st, work tr, dtr, and tr; in the next st, work dc and hdc; sc in the next st. Ch 1, turn.
- Row 6: Sc in the front loop of each st across. Fasten off.
- Second Side:
- Skip 2 sc, 2 sl sts, and 2 sc. Attach Purple and work the other side to correspond by repeating Rows 5 and 6. Fasten off.
Edging and Body:
- Edging for Wings:
- Attach Turquoise in the end st of the starting chain. Working over one pipe cleaner to cover it, sc in each st of the starting chain. Fasten off.
- Body:
- With Purple, work sc closely over the other pipe cleaner. Fasten off.
- Fold the covered pipe cleaner in half and sew it together for 2 inches from the fold to form the body. The remaining ends form the antennae.
Assembly:
- Sew the body securely in place across the center of the wings.
- Attach the butterfly to a clip or small comb with hot glue.
Your Butterfly Hair Clip is now complete!


