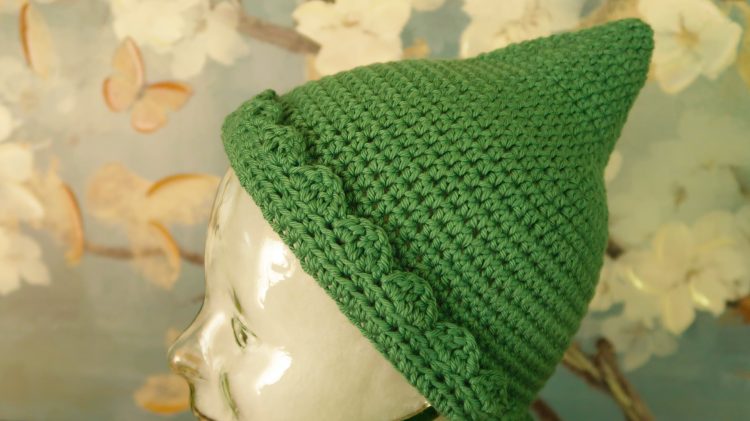
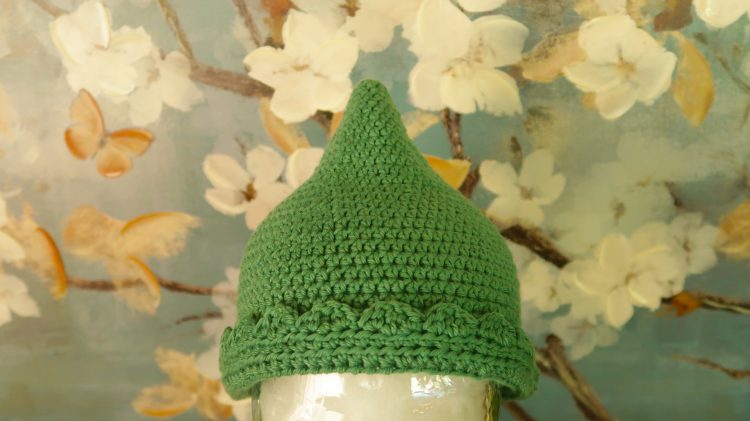
I love pixie hats! So, of course, we’re going to make a crochet pixie hat today. This hat goes by many different names: elf hat, pixie hat, l or lost boy hat;
Pixie hats were popular for a time in the 1950’s but have since been reduced to only being used for Halloween costumes or for cosplay. I think they’re adorable enough to be worn everyday though. So let’s make one!
This is a very easy, beginner friendly crochet pattern. The pattern uses half double crochet stitches to make the body of the hat. The optional border is pretty simple too using only basic stitches. I love how this hat turned out and I know you’ll love it too!
Okay, let’s get started! You can also watch my instructional video below to help you out.
For this project you will need:
- 1 skein of green yarn. I used “KC Essential Cotton” available at Joann’s in the color Rain Forest. Here’s the link.
- A crochet hook. I used an G/6 4.25 mm hook.
- Scissors
- Yarn needle for weaving in the yarn tails.
Crochet stitches used in this pattern (US terms):
Magic Circle aka Magic Ring
Ch – Chain
Hfd – Half double crochet
Ss – Slip stitch
Sc – Single crochet
Dc – Double crochet
Trp – Treble crochet aka Triple crochet
This pattern starts by making a magic circle. If you don’t know how to make a magic circle you can watch my very detailed YouTube video:
Crochet Pixie Hat – Adult Size – Free Crochet Pattern Instructions
- Make a magic circle aka magic ring
- 8 Hdc into magic ring. At the end, slip stitch into the first Hdc. Use a stitch marker at this point and chain 2 (8)
- HDC into each stitch around at the end of the round move your stitch marker to this spot and ss into the first ch 2 you made at the beginning and ch 2 (8)
- Make 2 HDC into the first stitch, 1 HDC into the next stitch and repeat around. At the end of the round move your stitch marker to this spot and ss into the first ch 2 you made at the beginning and ch 2 (16)
- HDC into each stitch around at the end of the round move your stitch marker to this spot and ss into the first ch 2 you made at the beginning and ch 2 (16)
- Make 2 HDC into the first stitch, 1 HDC into the next 2 stitches and repeat around. At the end of the round move your stitch marker to this spot and ss into the first ch 2 you made at the beginning and ch 2 (24)
- HDC into each stitch around at the end of the round move your stitch marker to this spot and ss into the first ch 2 you made at the beginning and ch 2 (24)
- Make 2 HDC into the first stitch, 1 HDC into the next 3 stitches and repeat around. At the end of the round move your stitch marker to this spot and ss into the first ch 2 you made at the beginning and ch 2 (32)
- HDC into each stitch around at the end of the round move your stitch marker to this spot and ss into the first ch 2 you made at the beginning and ch 2 (32)
- Make 2 HDC into the first stitch, 1 HDC into the next 4 stitches and repeat around. At the end of the round move your stitch marker to this spot and ss into the first ch 2 you made at the beginning and ch 2 (40)
- HDC into each stitch around at the end of the round move your stitch marker to this spot and ss into the first ch 2 you made at the beginning and ch 2 (40)
- Make 2 HDC into the first stitch, 1 HDC into the next 5 stitches and repeat around. At the end of the round move your stitch marker to this spot and ss into the first ch 2 you made at the beginning and ch 2 (48)
- HDC into each stitch around at the end of the round move your stitch marker to this spot and ss into the first ch 2 you made at the beginning and ch 2 (48)
- Make 2 HDC into the first stitch, 1 HDC into the next 6 stitches and repeat around. At the end of the round move your stitch marker to this spot and ss into the first ch 2 you made at the beginning and ch 2 (56)
- HDC into each stitch around at the end of the round move your stitch marker to this spot and ss into the first ch 2 you made at the beginning and ch 2 (56)
- Make 2 HDC into the first stitch, 1 HDC into the next 7 stitches and repeat around. At the end of the round move your stitch marker to this spot and ss into the first ch 2 you made at the beginning and ch 2 (64)
- HDC into each stitch around at the end of the round move your stitch marker to this spot and ss into the first ch 2 you made at the beginning and ch 2 (64)
- Make 2 HDC into the first stitch, 1 HDC into the next 8 stitches and repeat around. At the end of the round move your stitch marker to this spot and ss into the first ch 2 you made at the beginning and ch 2 (72)
- HDC into each stitch around at the end of the round move your stitch marker to this spot and ss into the first ch 2 you made at the beginning and ch 2 (72)
- Make 2 HDC into the first stitch, 1 HDC into the next 9 stitches and repeat around. At the end of the round move your stitch marker to this spot and ss into the first ch 2 you made at the beginning and ch 2 (80)
- HDC into each stitch around at the end of the round move your stitch marker to this spot and ss into the first ch 2 you made at the beginning and ch 2 (80)
- CHECKPOINT: This is where you will make sure that this hat is as wide as you want it to be. The size above should fit most adults.
But, if it’s not wide enough for your head then you will continue making an increase row and then a regular row of half-double crochets until it’s as wide as you need it to be.
If it’s too wide, then just frog 2 rows and see if it’s small enough. If it’s still too big, frog two more rows and continue doing this until it’s as small as you need it to be.
Once your hat is the width you want continue on with the pattern. - Make 10 Rows: HDC into each stitch around at the end of the round move your stitch marker to this spot and ss into the first ch 2 you made at the beginning and ch 2. (80)
- HDC into each stitch around at the end of the round move your stitch marker to this spot and ss into the first ch 2 you made at the beginning. Do Not Chain 2 (80)
- Now we’re going to make the border. ss into the first st, HDC and DC into the next st, Tr into the third stitch, DC and HDC into the fourth st and ss into the fifth st. Continue this pattern around. SS into the last st and fasten off! Your hat is complete!
Stay tuned for more fun FREE crochet patterns. Bookmark my website and check back. You can also subscribe to my Youtube channel:Tiffany Bliss