
Using plants from your garden to create natural dyes is an ancient practice that connects you with nature while producing stunning, eco-friendly colors. Whether you’re interested in dyeing fabrics, paper, or crafting materials, plant-based dyes are a sustainable alternative to synthetic options. The process is both creative and rewarding, as you’ll explore how different plants yield a wide spectrum of colors. In this first part, we’ll focus on understanding the basics of plant-based dyeing and how to harvest and prepare plants for the process.
Understanding Plant-Based Dyes
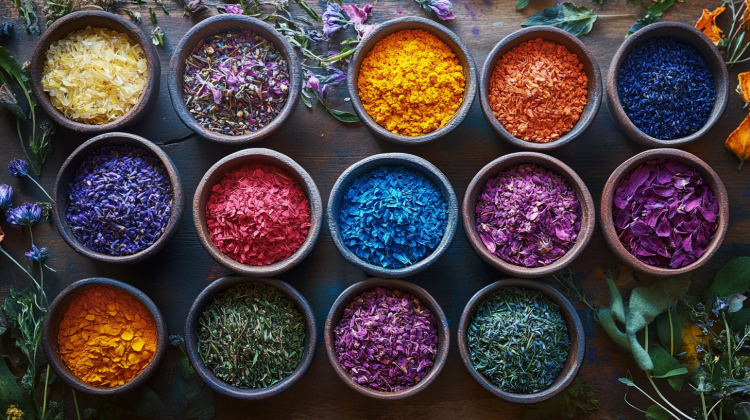
Plant-based dyes are derived from the pigments found in leaves, roots, flowers, bark, and even seeds of various plants. Each part of the plant contains natural compounds, such as chlorophyll, tannins, flavonoids, and anthocyanins, that produce vibrant and unique colors. For example, marigolds yield yellows, red cabbage creates purples and blues, and onion skins can produce warm orange tones. The beauty of using garden plants is that they provide a seasonal palette, allowing you to experiment with colors that change throughout the year.
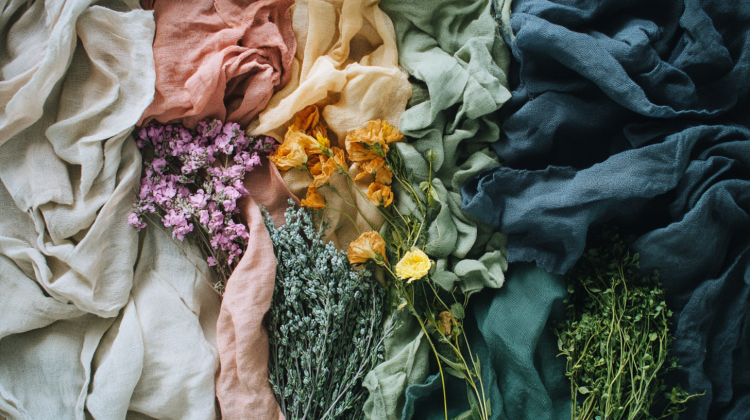
Choosing and Harvesting Dye Plants
Before you start dyeing, it’s important to identify which plants in your garden are suitable for creating dyes. Some common garden plants that yield beautiful colors include:\n
- Marigold flowers: Yellow to golden tones.\n
- Red cabbage: Purples and blues depending on pH.\n
- Beets: Rich reds and pinks.\n
- Onion skins: Warm oranges and browns.\n
- Blackberries or blueberries: Deep purples and blues.\n
- Mint or spinach leaves: Soft greens.\n
- Turmeric root: Bright yellow.\n
When harvesting, pick plants that are mature and vibrant in color, as this will yield the most pigment. For flowers, choose fresh blooms. For roots and leaves, ensure they are healthy and free from pests. Only harvest what you need to allow your plants to thrive and regenerate.
Preparing the Plants for Dyeing
Once harvested, your dye materials need to be processed to extract their pigment. Begin by rinsing the plants thoroughly to remove dirt and debris. Depending on the plant, you may need to chop it into smaller pieces to increase the surface area for pigment extraction. For flowers, petals can be used whole, while roots, bark, or leaves may need to be shredded or crushed.
Next, soak the plant material in water to begin releasing the dye. This can be done overnight or as part of the dye extraction process. At this stage, it’s helpful to have a dedicated pot or container for dyeing, as natural dyes can stain cookware.
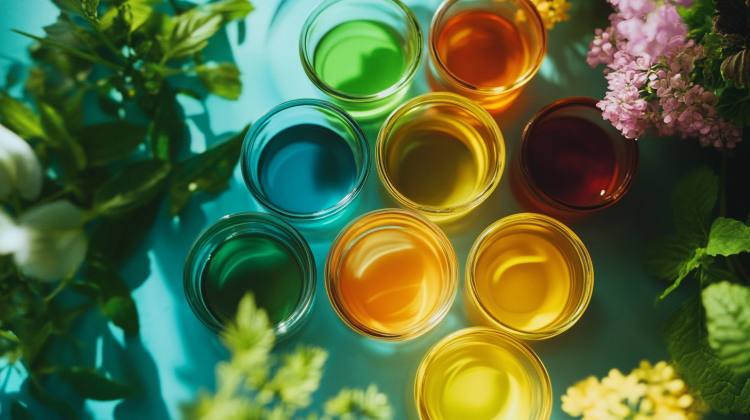
Extracting the Dye and Preparing Materials
Now that you’ve harvested and prepped your dye plants, it’s time to extract the vibrant colors they hold and prepare your materials for dyeing. This stage is where the magic begins, as you transform your garden’s natural pigments into usable dyes and get your fabrics or materials ready to absorb them effectively.
Extracting the Dye from Plants
The process of extracting dye involves simmering the plant material in water to release its pigments. Follow these steps to create your dye bath:
- Choose a Pot: Use a non-reactive pot (stainless steel or enamel-coated) to prevent the metal from altering the color of your dye. Keep a pot dedicated to dyeing, as natural pigments may stain cookware.
- Add Plant Material: Place your prepared plant material into the pot, filling it halfway to leave room for water.
- Add Water: Add enough water to cover the plant material. The water should exceed the material by about an inch to ensure good pigment extraction.
- Simmer Gently: Bring the water to a low simmer (not a boil) and let it simmer for about 30-60 minutes. Stir occasionally to ensure even extraction. The water should gradually take on the color of the plant material.
- Strain the Dye: Once you’re satisfied with the depth of color, strain the plant material from the liquid using a fine mesh strainer or cheesecloth. The resulting liquid is your dye bath.
Preparing Your Fabric or Material
To ensure your fabric or material absorbs the dye evenly and retains its color, you need to prepare it using a process called mordanting. Mordants are natural or chemical agents that help fix the dye to the fibers, making the color more vibrant and long-lasting.
- Select a Mordant: Common natural mordants include alum, iron, or tannin (found in certain plants like oak or sumac). These are gentle on fabrics and help create a stronger bond between the dye and fibers.
- Prepare the Mordant Bath: Dissolve your chosen mordant in water according to the instructions for the specific material you’re using. For example, alum powder typically requires about 1-2 teaspoons per gallon of water.
- Soak the Material: Submerge your fabric or material in the mordant bath and let it soak for at least 30-60 minutes. For deeper color absorption, you can soak it overnight.
- Rinse and Set Aside: After mordanting, rinse your fabric thoroughly with water to remove any excess mordant. Your material is now ready to be immersed in the dye bath.
Testing Colors with Swatches
Before fully dyeing your material, it’s a good idea to test the color on a small swatch of fabric. This allows you to gauge the intensity of the dye and make adjustments if needed. You can dilute the dye bath for lighter shades or re-simmer the plant material to deepen the color. Testing swatches also gives you an opportunity to experiment with different mordants, as some can alter the final hue of the dye.
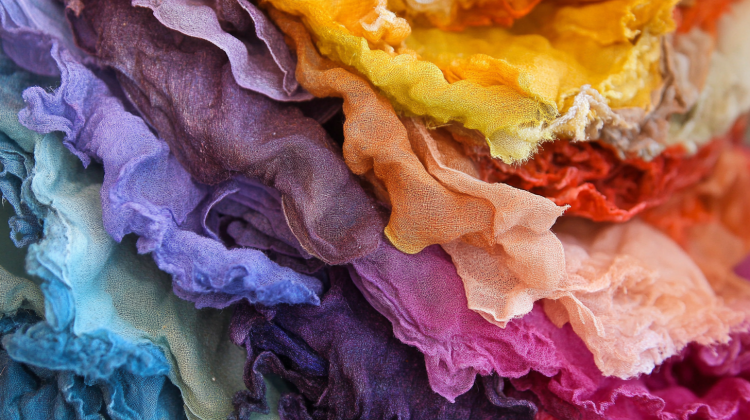
Dyeing and Setting the Color
Now that your dye bath is ready and your fabric or material has been mordanted, it’s time to start the dyeing process. This is where your garden’s natural pigments come to life, transforming your fabric into a beautifully colored creation. In this final step, we’ll explore how to dye your materials, achieve even coverage, experiment with layering, and set the dye to ensure it lasts.
The Dyeing Process
- Submerge the Material: Place your mordanted fabric or material into the dye bath, ensuring it is fully submerged. Use a wooden spoon or gloved hands to gently stir and press the material to allow even exposure to the dye.
- Simmer Gently: Heat the dye bath to a low simmer and allow the material to soak for 30-60 minutes. For deeper or more saturated colors, you can let the fabric soak longer or even let it cool in the dye bath overnight.
- Check the Color: Periodically lift the material out of the dye bath to check the color. Keep in mind that the fabric may appear darker when wet and will lighten slightly as it dries.
- Adjust for Intensity: If the color is too light, you can return the material to the dye bath for additional soaking. For lighter shades, you can dilute the dye bath with more water before submerging the material again.
Experimenting with Layers and Patterns
Natural dyeing allows for endless creativity, so don’t hesitate to experiment with layering colors or adding patterns to your material.
- Layering Colors: After dyeing with one plant-based dye, rinse the material and submerge it in a second dye bath to create unique blended hues. For example, an onion skin dye can create warm orange tones that layer beautifully with a red cabbage dye for muted purples.
- Shibori or Tie-Dye Techniques: Use rubber bands, clothespins, or string to create patterns on your fabric before dyeing. The tied areas will resist the dye, resulting in intricate designs once untied.
- Ombre Effects: Gradually lower your fabric into the dye bath, allowing the color to build up at different intensities for a gradient effect.
Setting the Dye
To ensure the color remains vibrant and doesn’t fade quickly, it’s essential to set the dye after the fabric has been dyed.
- Rinse Thoroughly: After removing your material from the dye bath, rinse it in cold water until the water runs clear. This helps remove any excess pigment.
- Set the Color: Some dyes benefit from an additional fixative, such as a vinegar or salt solution. For vinegar, mix one part vinegar to four parts water and soak the fabric for 15-30 minutes. For salt, dissolve 1/4 cup of salt in a gallon of water and soak for the same amount of time.
- Dry Naturally: Hang the fabric to dry in a shaded area, as direct sunlight can fade the colors. Allow the fabric to fully dry before washing or using it.
Caring for Naturally Dyed Materials
Hand-wash naturally dyed fabrics with gentle, pH-neutral soap to preserve the color. Avoid harsh detergents or prolonged exposure to sunlight, as these can cause fading over time. With proper care, your plant-dyed creations will retain their beauty and continue to showcase the magic of your garden.
By following these steps, you can transform plants from your garden into stunning natural dyes. The process is a fulfilling way to connect with nature, unleash your creativity, and produce one-of-a-kind items infused with vibrant, earth-friendly colors.


