
This Sailor Hat Crochet Pattern is a stunning vintage design that combines elegance with practicality, making it a timeless accessory for any wardrobe. Originally crafted with fine crochet thread, this updated pattern allows modern crafters to substitute size by using a single strand of #1 (superfine or sock yarn) or #2 (light size or fine) yarn if preferred, adjusting the hook size to achieve the same gauge. The structured brim and delicate crown details create a classic look that’s both stylish and functional, perfect for sunny days or as a statement piece for special occasions.
The construction of this hat showcases thoughtful techniques, including the use of millinery wire for a sturdy, professional brim edge and a decorative ribbon for added charm. The step-by-step instructions guide you through creating the intricate crown, shaping the brim, and finishing the edges with precision. Whether made in a crisp white for a traditional sailor look or in a bold color for a modern twist, this hat is as versatile as it is elegant.
This pattern is an engaging project for crocheters looking to create a high-quality accessory. The combination of detailed shaping, practical finishing touches, and vintage charm ensures a rewarding experience from start to finish. Whether crafted for personal use or as a thoughtful handmade gift, this sailor hat is a beautiful nod to timeless fashion updated for today’s crocheters.
About the Images
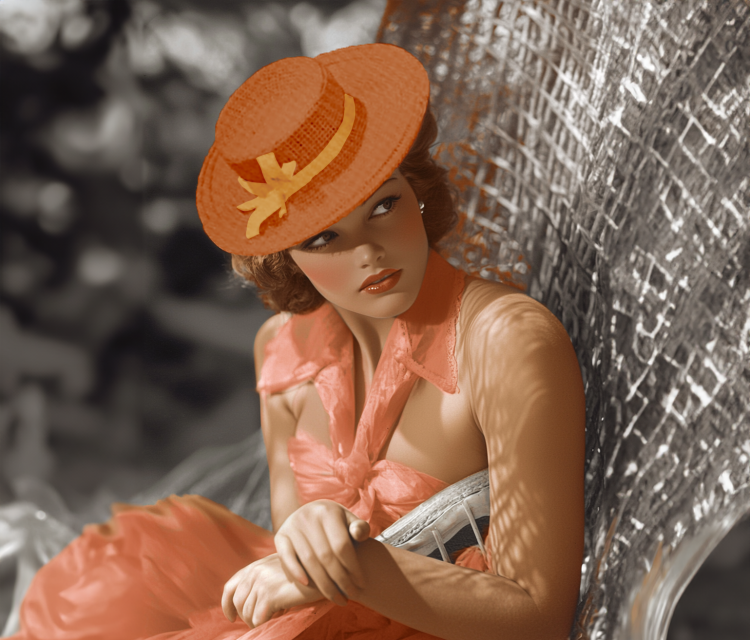
To help bring this design to life, we’ve included an AI-generated image of the finished pattern alongside the original vintage illustration. The original image highlights the charm and craftsmanship of the vintage design, while the AI rendering provides a detailed and colorized view of how the completed sweater will look. This combination ensures you have both a historical reference and a modern interpretation to guide you in your crafting journey.
This pattern is transformed, adapted, and expanded from a public domain design originally published in Easy to Make Hats, Scarves and Accessories by The Spool Cotton Company Book No. 192 (1943). While the original design is in the public domain, the rewritten instructions and supplementary content on this site are © Tiffany Bliss Mullins, 2025. All rights reserved. Have questions about this pattern, public domain, or copyright? Visit the FAQ page for answers and resources.

Sailor Hat
MATERIALS:
- Size 10 crochet thread (the pattern originally used Clark’s O.N.T. Mercerized Crochet, size 30): 8 balls of White or Ecru.
- Steel Crochet Hook: Size No. 2.
- 2 yards of grosgrain ribbon (1 inch wide).
- Millinery wire.
- Round elastic.
Gauge:
- 7 pattern stitches make 1 inch; 2 rows make 1 1/8 inches.
Notes:
- Use double thread throughout the entire hat.
- Modern alternative: You may also use a single strand of #1 (superfine or sock yarn) or #2 (light size or fine) yarn if preferred, adjusting the hook size to achieve the same gauge.
CROWN
- Starting at the tip of the Crown:
Chain 2.
1st round: 6 single crochets (sc) in the 2nd chain from the hook. Do not join rounds. Use a stitch marker to mark the first stitch of each round to ensure proper shaping.
2nd round: (Insert hook in next stitch and pull up a loop) twice, yarn over, pull through all 3 loops on the hook (pattern stitch), single crochet (sc) in the same stitch where the last loop was pulled through (increase). Repeat from * around (12 sts).
3rd round: (Insert hook in same stitch as the last single crochet and pull up a loop, insert hook in next stitch and pull up a loop, yarn over, pull through all loops on hook), single crochet in the same stitch as the last loop (increase). Repeat from * around (18 sts).
4th round: (Insert hook in the same stitch as the last sc and pull up a loop, insert hook in the next stitch and pull up a loop, yarn over, pull through all loops on the hook, single crochet in the same stitch as the last loop (increase). Repeat from * around (24 sts). - Continue increasing 6 stitches evenly on each round (marking the first stitch) until there are 96 stitches in total.
Work straight without increasing until the Crown measures 3 inches from the start.
BRIM
- 1st round of Brim: Increase in every 6th pattern stitch (112 sts).
- 2nd round: Increase in every 8th pattern stitch (126 sts).
- 3rd round: Work straight without increasing (126 sts).
- 4th round: Increase in every 9th pattern stitch (140 sts).
- 5th round: Work straight without increasing (140 sts).
- 6th round: Increase in every 10th pattern stitch (154 sts).
- 7th round: Work straight without increasing (154 sts).
- 8th round: Increase in every 11th pattern stitch (168 sts).
- 9th round: Increase in every 12th pattern stitch (182 sts).
- 10th round: Work straight without increasing (182 sts).
- 11th round: Increase in every 13th pattern stitch (196 sts). Do not fasten off.
WIRE EDGE
- Cut millinery wire 2 inches longer than the circumference of the Brim. Overlap wire ends by 2 inches and sew securely.
- Work 2 rounds straight in pattern stitches. Fasten off.
- Lay the wire on top of the Brim edge, fold the edge over the wire to cover it, and sew the edge down.
SECOND BRIM EDGE
- Reattach thread just inside the wired edge.
Next round: Work straight in pattern stitches over the wired edge (196 sts).
Following round: Increase 14 stitches evenly around (210 sts).
Next round: Work straight in pattern stitches (210 sts).
Following round: Increase 14 stitches evenly around (224 sts). - Cut another piece of wire 2 inches longer than this new edge circumference. Overlap and secure the wire as before.
- Work 2 rounds straight in pattern stitches. Fasten off.
- Finish this edge in the same way as the first wired edge.
FINISHING
- Block the hat as needed.
- Sew grosgrain ribbon inside the Crown to create a headband.
- Attach a ribbon band around the outside of the Crown and secure with a bow at the right front.
- Sew elastic across the back to fit snugly.


