
Venetian Bag Crochet Pattern
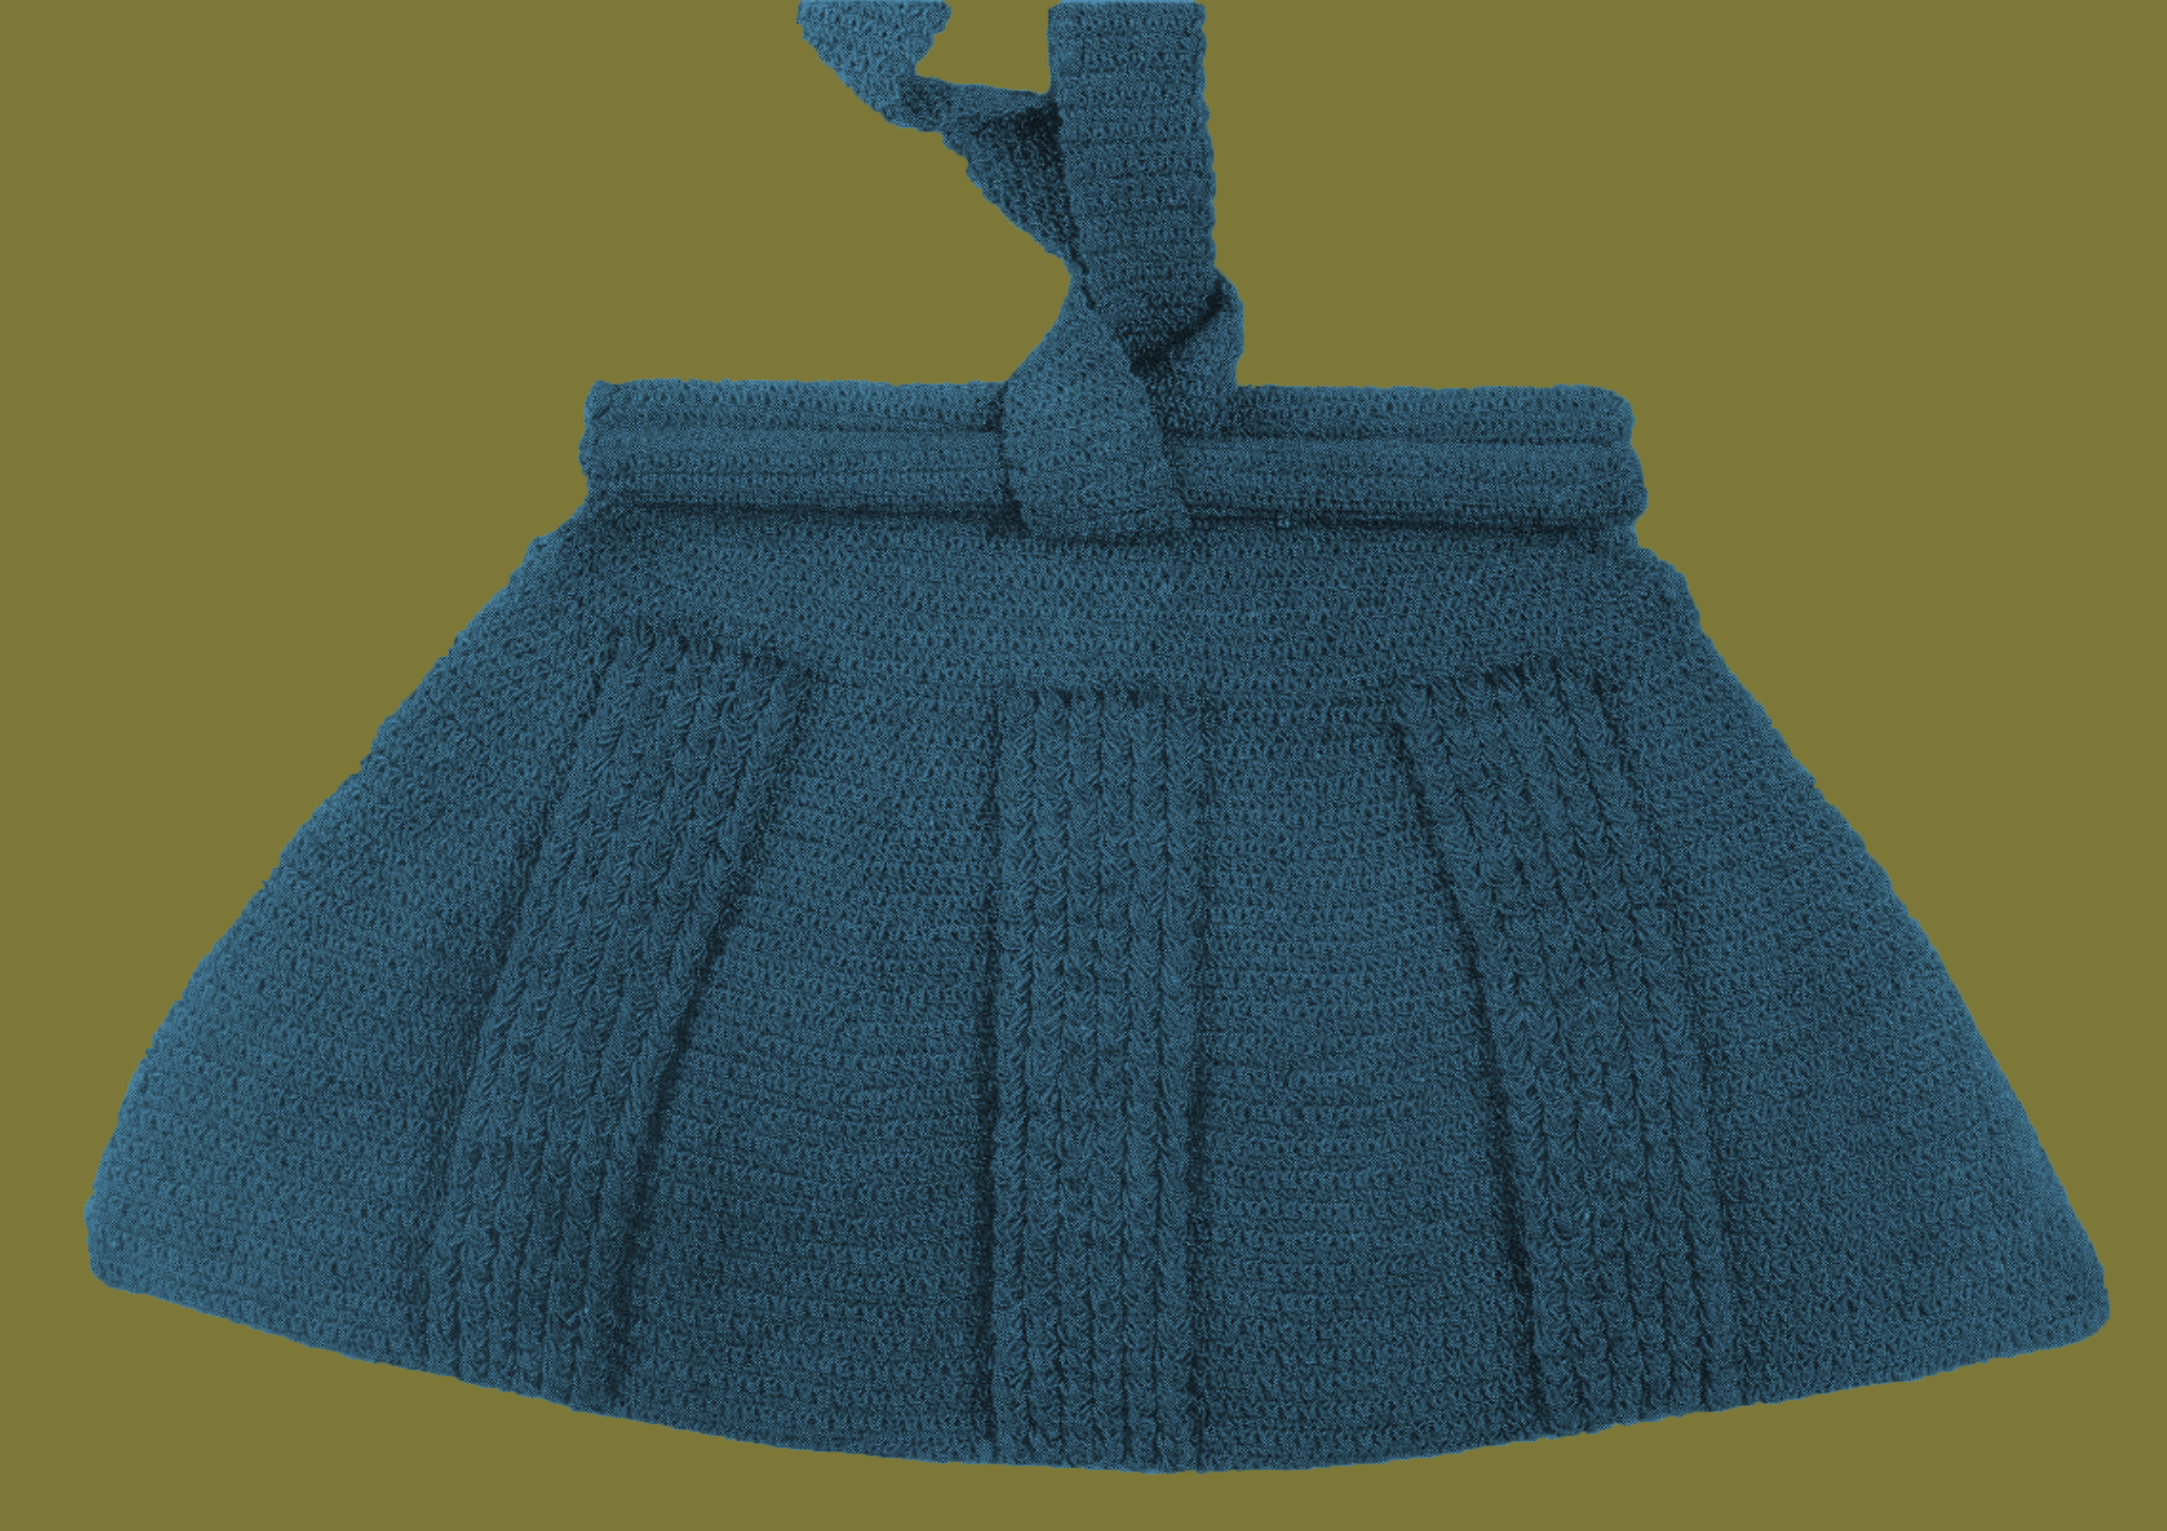
The Venetian Bag Crochet Pattern is a sophisticated and timeless design that embodies the elegance of vintage crochet. With its structured shape and the intricate cable stitch, this bag is a perfect accessory for adding a touch of class to any outfit. The use of gimp material gives it a polished, professional finish, while the slide fastener and gussets make it functional and practical for everyday use. Whether carried as a statement piece or gifted to someone special, the Venetian Bag stands out as a classic example of vintage craftsmanship.
This pattern is approachable for intermediate crocheters or confident beginners ready to expand their skills. The cable stitch, while appearing intricate, is a repetitive technique that can be easily mastered with practice. The pattern provides clear instructions to guide you through, ensuring the stitches align beautifully. Constructing the gussets and base may seem challenging at first, but it offers a rewarding opportunity to learn how to shape and assemble a structured bag. With a bit of patience and focus, these techniques will become second nature, making the project enjoyable and fulfilling.
Creating the Venetian Bag is a delightful journey of skill-building and creativity. The rhythmic repetition of the cable stitch offers a meditative crafting experience, while the structural elements add an exciting touch of variety to the process. By the time you finish, you’ll not only have a stunning, handmade vintage bag but also a sense of accomplishment from mastering new techniques. Whether you’re an experienced crocheter or a beginner seeking to challenge yourself, the Venetian Bag is a project that promises beauty, utility, and the satisfaction of crafting something truly special.
Discover more timeless designs from this vintage collection by exploring Bags and Hats Crocheted with Raphael Brand Gimp No. 5 (1939), where you’ll find all the patterns from this classic booklet.
This pattern is transformed, adapted, and expanded from a public domain design originally published in Bags and Hats Crocheted with Raphael Brand Gimp No. 5 (1939). While the original design is in the public domain, the rewritten instructions and supplementary content on this site are ©Tiffany Bliss Mullins, 2024. All rights reserved. Have questions about this pattern, public domain, or copyright? Visit the FAQ page for answers and resources.
Key Details
- Skill Level: Advanced
- Stitches Used: Single Crochet (SC), Cable Stitch
- Finished Size: Adjustable based on materials and rods used
Materials
- Gimp: 9 tubes of “Raphael Brand Gimp” (or a modern substitute). You can read more about gimp and modern substitution suggestions here: What is Gimp?
- Lining fabric (recommendation: about ½ yard)
- 2 Snap Fasteners
- 2 Rods (7 inches long) for the top of the bag opening.
Some Rod Suggestions:
- Plastic Canvas Rods:
- Lightweight and easy to cut to the desired length.
- Found in craft stores, often sold as supports for bag handles.
- Wooden Dowels:
- Available in different thicknesses at hardware or craft stores.
- Can be cut to size with a simple saw or craft tool.
- Metal Rods:
- Aluminum or stainless steel rods are durable and available in hardware stores.
- Perfect for a sturdy, long-lasting bag but slightly heavier.
- Heavy-Duty Wire:
- Thick, bendable wire (like floral or jewelry wire) can be used to create a similar structure.
- Ensure it’s stiff enough to hold the bag’s shape without bending too easily.
- Plastic Tubing or Piping:
- Flexible and lightweight, often found in plumbing or craft sections.
- Works well for modern, soft-sided bags.
- Bamboo or Chopsticks:
- Bamboo rods or even chopsticks can be repurposed for a unique, eco-friendly option.
- Sand down any rough edges before using.
- Bag-Specific Accessories:
- Modern bag-making hardware kits often include pre-made rods or supports, found in craft stores or online.
Choosing the Best Rod Material Option
The choice depends on:
- Bag Size: Larger bags may need sturdier rods like wooden dowels or metal.
- Weight: If the bag is meant to be lightweight, consider plastic or bamboo.
- Aesthetic Preference: Bamboo or decorative rods can enhance the vintage look of the bag.
Special Stitches
Cable Stitch:
Row 1:
- Yarn over, insert hook into the specified stitch, and pull through.
- Yarn over, insert hook into the same stitch, and pull through.
- Yarn over, insert hook into the same stitch a third time, and pull through.
- Yarn over and pull through all 7 loops on the hook.
- Ch 1 to lock the stitch.
Row 2 and Onward:
- Work Cable Stitch around the Cable Stitch of the previous row by inserting the hook directly into the back of the Cable Stitch.
Note: Do not work into the chain-1 that locks the Cable Stitch.
Pattern
Bag Body
- Foundation Chain: Ch 62.
- Row 1: SC in the second chain from the hook and in each chain across. Ch 1, turn.
- Rows 2–10: SC in each stitch across. Ch 1, turn.
- Row 11: Join the first and tenth rows with SC, creating a circular base. Ch 1, turn (61 stitches).
- Rows 12–14: SC in each stitch across. Ch 1, turn.
- Row 15: SC twice in the first stitch, SC in each stitch across, SC twice in the last stitch. Ch 1, turn.
- Rows 16–22: Alternate Rows 2 and 15, creating even increases.
- Row 23: SC in the first 7 stitches, Cable Stitch in the next stitch, skip the next stitch. Repeat from * 4 more times, Cable Stitch in the next stitch, SC in the next 11 stitches. Repeat the Cable Stitch pattern once more, then SC in the last 7 stitches. Ch 1, turn.
- Row 24: SC in each stitch, making 1 increase in each SC section (4 increases in total). Ch 1, turn.
- Row 25: SC in each SC and Cable Stitch around each Cable Stitch. Ch 1, turn.
- Rows 26–43: Alternate Rows 24 and 25.
- Rows 44–49: Continue alternating Rows 24 and 25, but make increases only in the first and last SC sections (2 increases per row).
- Rows 50–73: Alternate Rows 2 and 25 without additional increases. Fasten off.
Second Panel
Make another panel identical to the first.
Assembly
- Join the sides of the panels together with SC on the wrong side, starting and ending at Row 52.
- Insert the rods at the top of the bag and sew each end securely to close the top edge.
Gussets
- Row 1: Attach Gimp at Row 22 on the right side and SC evenly around the opening. Ch 1, turn.
- Rows 2–7: SC in each stitch across. Ch 1, turn.
- Fold the gusset in half and join the edges with slip stitches on the wrong side. Fasten off.
Loop
- Foundation Chain: Ch 10.
- Row 1: SC in the second chain from the hook and in each chain across. Ch 1, turn.
- Rows 2–X: SC in each stitch across until the loop measures 6 inches in length.
- Sew the loop to each side of the front rod.
Handle
- Work as for the loop, but make the handle 12 inches in length.
- Sew both ends of the handle to the back rod on the right side.
- Insert the handle through the loop to secure the bag closure.
Finishing
- Sew the lining into the bag for a polished interior. Use lightweight fabric adjusted to fit the bag’s dimensions.
- Attach the snap fasteners for additional security.
The Venetian Bag’s intricate Cable Stitch pattern and practical design make it a standout accessory. Enjoy creating this elegant bag, and don’t forget to share your finished masterpiece with the crochet community!


