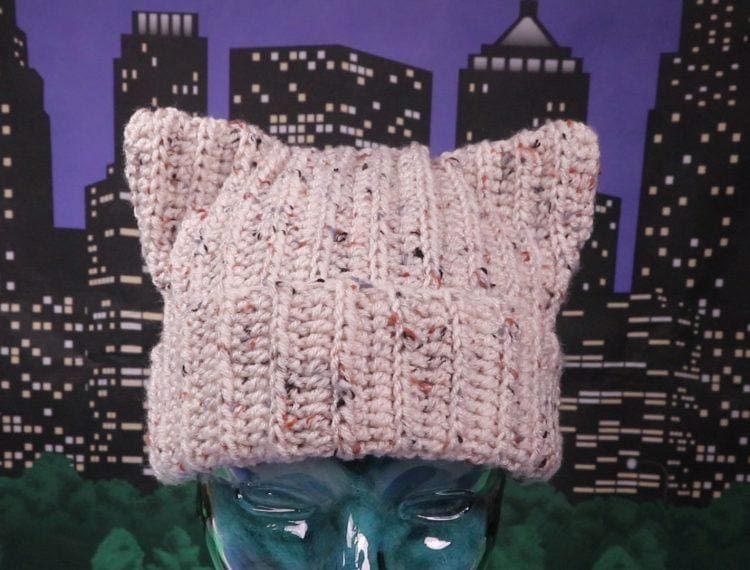
This is such a cute and fun hat and it’s the easiest crochet hat for beginners you can make. I think it’s even easier than my other beginner crochet hat because it’s just a rectangle folded in half and slip stitched up the side and top. There isn’t any gathering involved in this one, it’s a small difference, but changes the whole hat entirely. I don’t think there is an easier way to make a crochet beanie.
Since this is a beginner project, we’re only going to use one stitch: the half double crochet. This is really my favorite stitch for beginner crochet projects. If you want to know why, I actually wrote an article about it and you can find that post here.
Now onto making this adorable and simple crochet hat.
This is an adult size hat and one size fits most. However if you want to make this longer or shorter add stitches to the initial chain. If you want this to fit around a larger or smaller head, make more rows.
You will need:
Yarn: I’m using Red Heart Super Saver acrylic yarn. It’s a 4 weight and the color is called “Aran Fleck.”
Crochet hook: I’m using a size I/9 5.5 mm hook
Scissors
Yarn needle
Instructions:
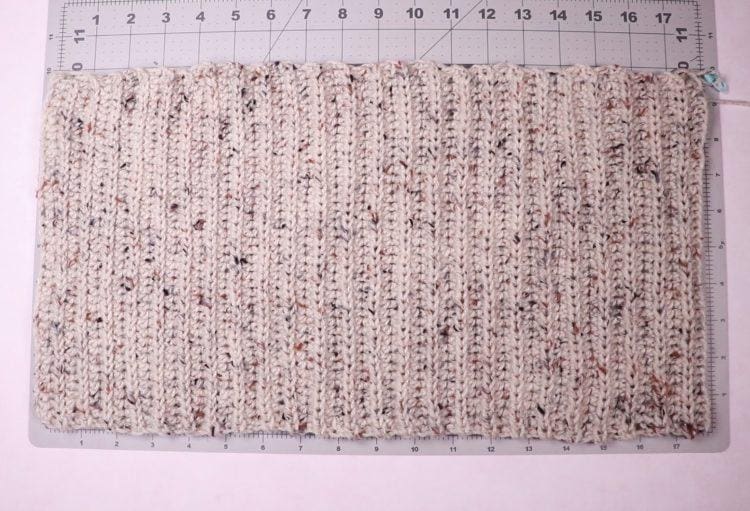
- First you’re going to make a row of 42 chains.
- Once you’ve made your row of 42 chains you’re going to work your first half double crochet in the second stitch. You’ll make a half double crochet in every stitch down the row. When you get to the end, chain 2 and turn your work.
- This project makes a ribbed textured hat, which really sounds more complicated than it is. And this is the step where we start making the ribbed look. To do this you’re going to only work in the back loop of each stitch. So, in the first stitch work a half double crochet in only the back loop. You’ll make a half double crochet in the back loop of every chain down the row. When you get to the end of the row, chain 2 and turn your work.
- Repeat step 3 until you have 50 rows in all. When you reach the end of the 50th row, do not chain 2.
- Once you have 50 rows, you’ll have a large rectangle. Mine measured roughly 18-18 1/2 inches by 10 inches.
- Now fold the rectangle in half and slip stitch up the side of the hat. When you reach the top, continue slip stitching along the top.
- Chain one and pull the yarn through and cut, leaving a small tail. Work the yarn tail through your work with a yarn needle. This hides the tail and secures the end. Repeat for the other tail.
- And that’s it! You have a really cute crochet cat hat that’s ready to wear. I will note that some people stitch along the ear section, but I’ve found this isn’t necessary.
Watch the video below for a more in depth step by step crochet tutorial. We also have a left handed version you can watch here.


