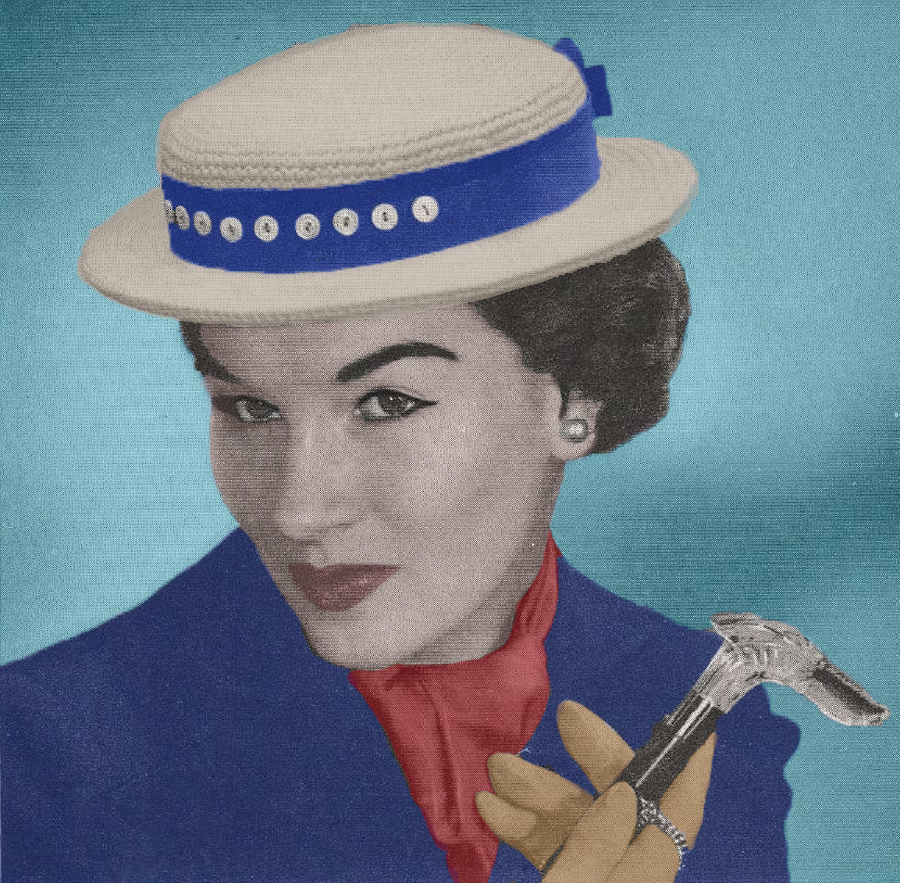

This charming Sailor Hat crochet pattern combines a classic nautical aesthetic with functional design elements. Crafted using durable P & B Superior Double Knitting yarn, the hat features a structured brim reinforced with millinery wire for a polished finish. The meticulous construction includes short rows to shape the brim and unique details like string reinforcement to maintain the hat’s form and fit. The design’s versatility allows crafters to tailor the colors and trimmings to suit their personal style, making it both a timeless and customizable accessory.
The pattern also incorporates decorative elements that elevate its appeal, such as contrasting grosgrain ribbon and a playful arrangement of buttons at the center front. These thoughtful additions highlight the versatility of crochet as an art form, blending traditional craftsmanship with modern sensibilities. Whether worn for a seaside stroll or a casual outing, this Sailor Hat adds a touch of vintage elegance to any outfit.
This pattern is transformed, adapted, and expanded from a public domain design originally published in the mid-20th century. While the original design is in the public domain, the rewritten instructions and supplementary content on this site are © Tiffany Bliss Mullins, 2024. All rights reserved. Have questions about this pattern, public domain, or copyright? Visit the FAQ page for answers and resources.
The Sailor Hat Crochet Pattern
Materials
- P & B Superior Double Knitting, Patonised, 4 ozs.
- One No. 00 Steel Crochet Hook (American Gauge)
- ¾ yard Grosgrain Ribbon (1 inch wide) in three colors: one matching the hat and two contrasting colors
- 9 Buttons
- 62¾ inches heavy Millinery Wire
- Two lengths of strong string, each 30 inches long
Head Size
22 inches
Instructions
Crown
- Foundation Chain: Chain 10.
- Round 1: Work 1 single crochet in the 2nd chain from the hook, 1 single crochet in each of the next 7 stitches, 3 single crochet in the last chain. Continue working along the other side of the foundation chain, making 1 single crochet in each of the next 7 stitches and 2 single crochet in the last stitch. (20 single crochet in the round)
- Round 2: Work 2 single crochet in the first stitch, 1 single crochet in each of the next 2 stitches. Repeat from * to end of the round.
- Round 3: Work 1 single crochet in each of the next 5 stitches, 2 single crochet in the next stitch. Repeat from * to end of the round.
- Increasing Rounds: Continue working in single crochet, increasing evenly as needed to maintain a flat, oval shape. Do not increase directly above previous increases. Work until the oval measures 6¾ inches wide and 7¾ inches long. The outer edge should measure the desired head size.
- Even Rounds: Work evenly in single crochet for 1¼ inches.
- String Reinforcement:
- Lay one piece of string along the previous round and work 1 round of single crochet over it to cover.
- Work 1 round without the string.
- Work the final round of the crown over the second piece of string.
- Pull the strings to the desired head size and tie them firmly.
Brim
- Increase Round: Work 2 single crochet in the first stitch, 1 single crochet in the next stitch. Repeat from * to end of the round.
- Work 2 even rounds firmly in single crochet to prevent frilling. Finish opposite the foundation chain’s starting point. Slip stitch in the next stitch, fasten off, and weave in ends.
- Short Rows for Brim Shape:
- Row 1: Join yarn 6 stitches to the left of the center back. Work single crochet to 7 stitches before the end of the previous round. Slip stitch in the next stitch, fasten off, and weave in ends.
- Row 2: Join yarn in the 6th stitch of the previous row. Work single crochet to 7 stitches before the end of the row. Slip stitch in the next stitch, fasten off, and weave in ends.
- Repeat Row 2 eight more times, creating 5 short rows in total. Do not break the yarn at the end of the 5th row.
- Brim Edge: Continue working evenly in single crochet around the brim until it measures 2 inches at the center front.
Finishing
- Wire the Brim:
- Cut two lengths of wire: one 30 inches and the other 32¾ inches. Overlap the ends of each piece by 2 inches and sew firmly to form two ovals: one 28 inches around and the other 30¾ inches around.
- Work 1 round of single crochet over the smaller wire oval. Fasten off and weave in ends.
- Form the Hem:
- Allow the smaller wire to gather the brim edge slightly to create a ¾-inch-deep hem.
- Turn the hem under the brim and press to smooth any fullness.
- Insert the larger wire oval into the hem, fitting it snugly against the brim’s outer edge. Sew the hem lightly in position.
- Add Ribbon and Buttons:
- Cut the matching ribbon to the head size, leaving ½ inch on each end for the seam. Sew it to the inside of the crown.
- Arrange the contrasting ribbons as illustrated and sew the buttons across the center front.
- Lightly tack the ribbons around the crown, leaving 2-inch ends at the back.
Your Sailor Hat is now complete, ready to evoke timeless nautical charm!


