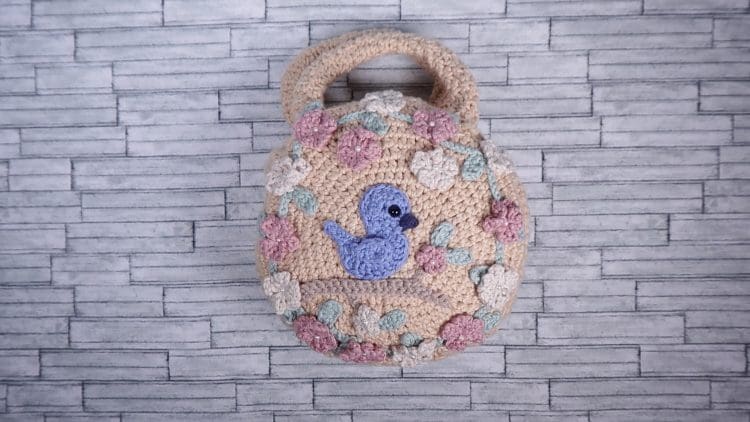
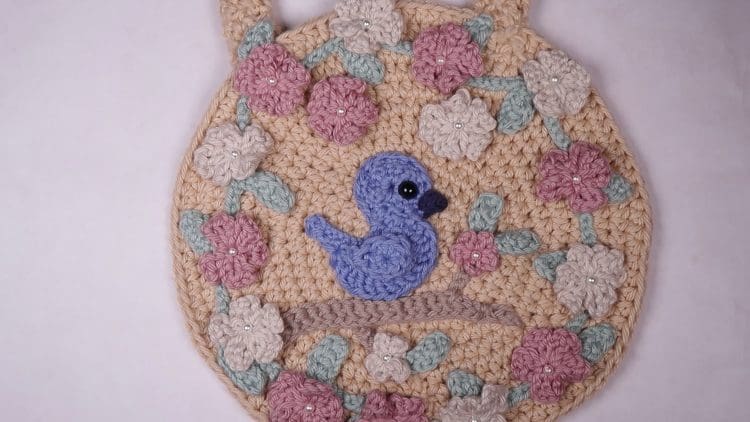
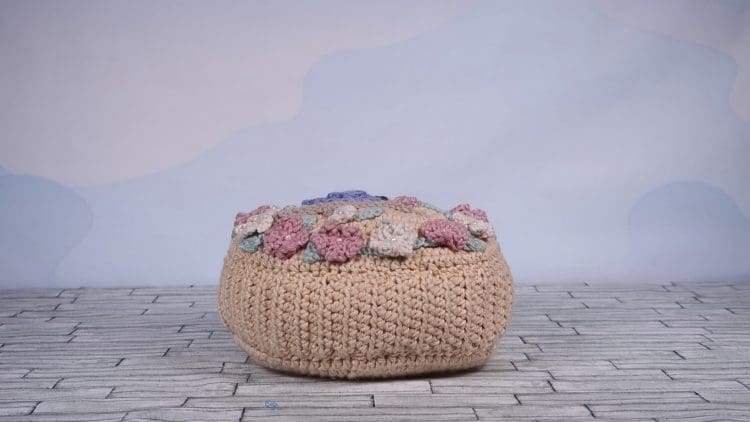
Today I’m going to show you how I made my round crochet purse. This one has pretty flower appliques and a cute bluebird applique as well. You may recognize this sweet little bird from an earlier post: Easy Crochet Bird Applique. I really wanted a cute little round crochet purse for spring and summer and this is what I came up with.
This purse has a fabric lining and zipper opening. Crochet purses can lose their shape easily if they don’t have a lining to protect the shape. It’s a little time consuming but worth it in the end. Okay, I’m not one for long introductions, let’s get to work!
For this project you will need:
- #4 worsted weight yarn. 2 skeins tan, and remnants of white, blue, pink, and green. Except for the tan yarn you will only use a little of each, so if you have these colors in your stash, this is a great stash buster project
- A crochet hook. I used an G/6 4.25 mm hook.
- Scissors
- Yarn needle for weaving in the yarn tails.
- 1 yard of fabric for the lining
- 1 zipper
- sewing needle and thread to match the lining.
- pearl beads (optional)
Crochet the Body of the Purse
- Make a magic circle and chain 2 (chain 2 counts as Hdc)
- 7 Hdc into circle, Ss into first chain, then chain 2
- 2 Hdc into each stitch until the end Ss into chain then chain 2.
- 1 Hdc into next stitch then 2 Hdc in the next stitch repeat this pattern until the end of the round where you will Ss into the chain then chain 2.
- Hdc into next 2 stitches then 2 Hdc in the 3rd stitch. Repeat this pattern until the end of the round where you will slip stitch into the chain that began the round, then chain 2.
- Hdc into next 3 stitches then 2 Hdc in the 4th stitch. Repeat this pattern until the end of the round where you will slip stitch into the chain that began the round, then chain 2.
- Hdc into next 4 stitches then 2 Hdc in the 5th stitch. Repeat this pattern until the end of the round where you will slip stitch into the chain that began the round, then chain 2.
- Hdc into next 5 stitches then 2 Hdc in the 6th stitch. Repeat this pattern until the end of the round where you will slip stitch into the chain that began the round, then chain 2.
- Hdc into next 6 stitches then 2 Hdc in the 7th stitch. Repeat this pattern until the end of the round where you will slip stitch into the chain that began the round, then chain 2.
- Hdc into next 7 stitches then 2 Hdc in the 8th stitch. Repeat this pattern until the end of the round where you will slip stitch into the chain that began the round, then chain 2.
- Hdc into next 8 stitches then 2 Hdc in the 9th stitch. Repeat this pattern until the end of the round where you will slip stitch into the chain that began the round, then chain 2.
- Hdc into next 9 stitches then Hdc in the 10th stitch. Repeat this pattern until the end of the round where you will slip stitch into the chain that began the round, then chain 2.
- Hdc into every stitch. Do not increase in this round. when you reach the end slip stitch into the first chain and fasten off.
- Repeat steps 1-13 to make the other side of the purse.
Crochet the Purse Handles
- Chain 6
- HDC in second chain from the hook, then Hdc down the row. At the end chain 1 and turn your work. You should have 4 HDC in this row.
- Starting with the first stitch, make a HDC in every stitch down this row. At the end chain 1 and turn your work. You should have 2 rows of 4 HDC.
- In this row we’re going to increase stitch into every stitch down the row. That means make 2 HDC into every stitch. At the end, chain 1 and turn your work. You should have 8 HDC stitches in this row.
- Now make 26 rows of 1HDC into every stitch. Every row should have the same 8 stitches. At the end of each row chain 1 and turn your work.
- Once you have 26 rows, we’re going to make decrease stitches into the 27th row:
- Yarn over and insert your hook into the first stitch.
- Yarn over and pull the yarn through.
- Insert your hook into the next stitch
- Yarn over and pull the yarn through (4 loops on the hook)
- Yarn over and pull the yarn through all four loops.
- You’ve completed your first decrease stitch. Now repeat this step for every stitch down the row. You will have 4 stitches at the end. Chain 1 and turn your work.
- Make 2 rows of HDC into every stitch. Then fasten off.
- Fold the handle at the wide points and sew it together in the middle using a yarn needle and the same color yarn as the purse. You will only be sewing through 2 layers. Don’t sew all the way through the top layer.
- Next position the handles onto the round body of the purse sections. One on each side. Pay attention to which side of the handle and which side of the purse is going to be pointing outwards because the stitches will look different depending on which side of the purse body and handles are showing. You’ll want to make sure that the handles line up on each side of the purse body. You can use sewing pins to hold the handles in place.
I actually forgot to pay close attention when I was sewing the handles on and it worked out just fine. And, honestly, there is no right side or wrong side of the crochet to be pointed outward (it’s not like fabric) there is only one’s personal preference for which side should be facing out. So, don’t sweat it too much. - Sew the handles on using a yarn needle and the same color yarn as the purse.
Crochet the Purse Side
- Chain 10
- Starting in the second chain from the hook make a HDC in every loop down the row. When you get to the end chain one and turn.
- HDC in every loop, chain one at the end and turn.
- Repeat step 3 until you have about 60 rows. DO NOT CUT THE YARN YET. We still need to finish the top part where the zipper goes. Also I want to add, this should not reach all the way around the purse since we are going to crochet a space for the zipper.
- Before we go further, position this piece around your purse and position the zipper at the top. Make sure the ends of the zipper are hidden by the edges of this side piece. If not add a few more rows. If you’re going to be cutting your zipper to size, this doesn’t really apply. Once you have the length you want, we can proceed.
- Chain one if you haven’t already from the previous row.
- Make an HDC in the next three stitches chain one and turn.
- Repeat step 7 until you reach the other side of the purse and fasten off.
- Loop into the other side and make HDC in the next three stitches, ch one and turn and repeat until you have the same number of rows as the other side. fasten off.
- Sew the ends to the other side of the side piece.
Blue Bird Crochet Appliqué
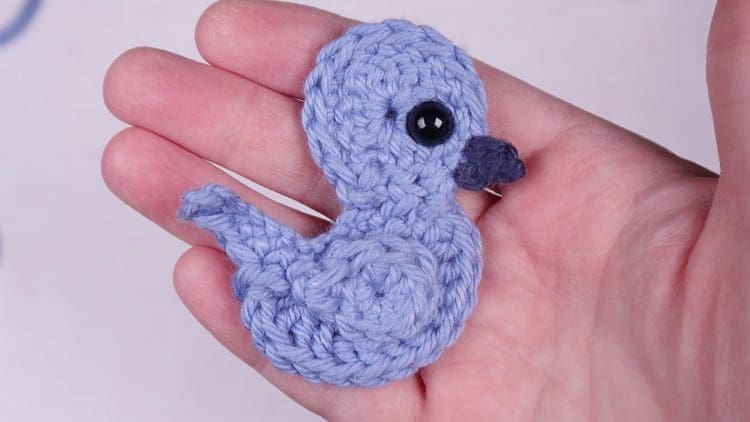
Crochet Bird (Head and Body)
- Make a magic circle (or chain four and slip stitch into first loop to make a circle)
- Chain 3 (counts as first DC)
- Make 15 DC into the circle (since we’re counting the first chain 3 as a DC you’ll have a total of 16 DC (this is the bird head)
- Slip stitch into first DC (remember that’s the chain 3 we’re pretending is a DC) and pull tight the center of your magic circle.
- Now chain 12 and turn. (So now you’re working back down the chain you just made.)
- HDC in 3rd stitch from the hook.
- SC into the next 9 stitches. (until you reach the bird head)
- Slip stitch into 2 stitches on the bird head and turn. (Now you’re going to be working back down the body again.)
- Skip 2 stitches and in the 3rd SC down the body you’re going to make 6 DC in that same stitch.
- Skip one stitch and slip stitch into the next 3 stitches. And turn again (now we’re working our way back towards the head).
- Skip 2 stitches and make 3 DC into the 3rd stitch.
- Make 2 DC into the Next 5 stitches.
- Slip stitch into the first stitch in the head and then SC around the whole head of the bird working your way back to the top of the body on the other side. Slip stitch into the last stitch and fasten off.
Bird Beak
You can decide where you want to place the beak. I decided to skip one stitch at the edge of the body and start in the next stitch.
- Slip stitch into the head of the bird where ever you want the beak to be.
- SC into the next stitch.
- Chain 1
- Fasten off (that was easy, right?)
Bird Wing
- Make a magic ring (or chain 4 and slip stitch into the first stitch).
- Make 8 HDC into the ring.
- Slip stitch into first HDC and pull your magic circle closed.
- HDC into the first stitch and chain 1 then fasten off. (almost as easy as making the beak, right?)
You can make one or two bird wings, depending on how you want to stylize your bird.
Finishing the Bird
You can add a button or bead for the bird’s eye or use yarn or embroidery thread to make the eye instead.
Your bird is now ready to be stitched onto the object of your choice. I recommend using a yarn needle and the same color yarn if your stitching it onto a crochet
Crochet Flowers
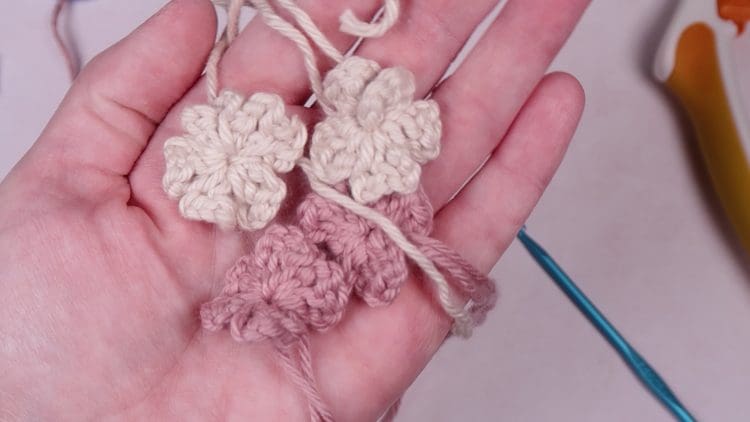
The size of your hook will greatly affect how large or small your flowers are without even changing yarn or pattern. I used a Size F hook for my flowers.
- Make a magic ring (or chain 4 and slip stitch into the first stitch).
- Chain 3
- Make a double crochet into the ring
- Chain 3
- Slip stitch into the ring (this makes your first petal)
- Repeat steps 2-5 until you have 5 petals.
- After the last petal fasten off.
To make smaller Flowers:
- Make a magic ring (or chain 4 and slip stitch into the first stitch).
- Chain 6
- Slip stitch into the ring (this makes your first petal)
- Repeat steps 2-3 until you have 5 petals.
- After the last petal fasten off.
Crochet Garland of leaves
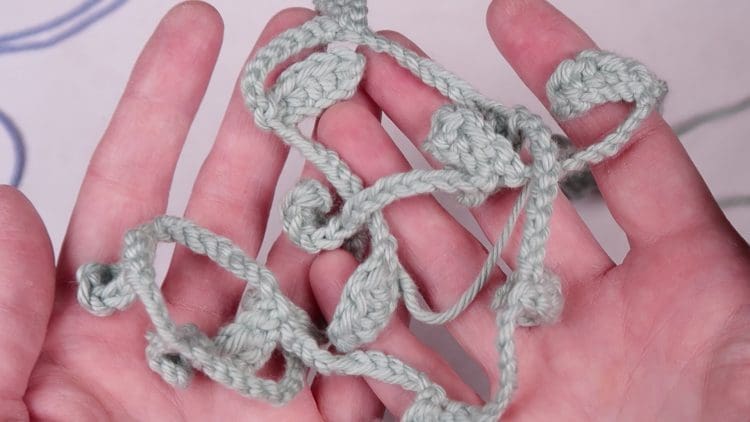
The size of your hook will greatly affect how large or small your leaves are without even changing yarn or pattern. I used a Size F hook for my leaves.
- Chain 8
- Sc into the first chain from the hook
- HDC into the next chain
- DC into the next chain
- HDC into the next chain
- SC into the next chain
- SS into the next chain
- Chain 16
- Repeat steps 1-8 until your leaf garland is as long as you want.
Branch
- Chain 25
- SC from the first chain from the hook
- Slip stitch back down the chain until you reach the end and fasten off.
To make smaller branches on the large branch
- Slip stitch into a section of the branch.
- Make a chain as long as you want and fasten off.
Assembling the Purse
First Sew on the Front Decorations
- Using a needle and thread baste your pieces in place. Alternatively, you can pin them in place.
- Permanently sew the pieces in place using the same color yarn as the applique and a yarn needle. Don’t worry about how ugly the backside is because we’re going to be adding a lining.
- I added little pearl beads to my purse for decoration.
Sewing the Purse Together
1.Using a yarn needle and thread attach the side piece to the front of the purse. Make sure to center the top zipper opening with the top.
2. Don’t sew the back on yet. It makes it a million times easier to make the lining and insert it before the back piece is sewn on.
Making the Purse Lining
Cut Out the Pieces
- Using the front of the purse as a guide, include a seam allowance and cut out two pieces for the inside front and back.
- Using the side of the purse as a guide, cut out one piece of fabric the length of the side not including the zipper opening. Make sure to include seam allowance on all sides.
- Next Cut two pieces of fabric the length of the zipper opening, make sure to include a seam allowance on all sides.
If you want to be all fancy about it, you can cut the two pieces of fabric DOUBLE the width needed (with seam allowance added of course) and fold that piece in half and sew on. This will make it so that inside the purse you won’t have the wrong side of the fabric showing. However, you won’t really see this part anyway, so it’s up to you.

Sew Together the Pieces
- Sew in the Zipper between the smaller pieces from step 3 above with right side of the fabric facing up.
- Sew one end of the long piece (with wrong side facing up) to one end of the zipper piece. So, it’s going to look a little strange, the right side of the zipper will be next to the wrong side of the of the long piece. This is because we want the pretty right side to be showing when you open your purse and peer inside. But the top of the zipper piece could show through the top so that’s why it will look wrong.
- Next sew on one round side. From this point on you’ll sew the wrong sides together just as you would when you sew anything else. The only piece that will be backwards is the top zipper piece.
Then position the sewn pieces inside the crochet purse to see if you need to make any adjustments. If you need to make it smaller, sew a little closer to the inside. If you need to make it bigger, use a seam ripper to take out the seams and sew closer to the edge. Make sure to clip the edges when you’re finished. - Once you’re satisfied, sew on the other side and clip the edges.
- Don’t turn the lining inside out. It goes directly in the purse just as it is so that the pretty side is shown when you open your purse.
- Pin the top of the lining to the zipper opening in the crochet purse, making sure the zipper is centered. With a needle and thread, sew around the edge of the zipper.
- Next, using the same color yarn as the crochet purse and a yarn needle, attach the back side of the purse. Make sure to position the handles so that they are even with the front.
And that’s it! Now you have a very pretty crochet bird purse for spring!


