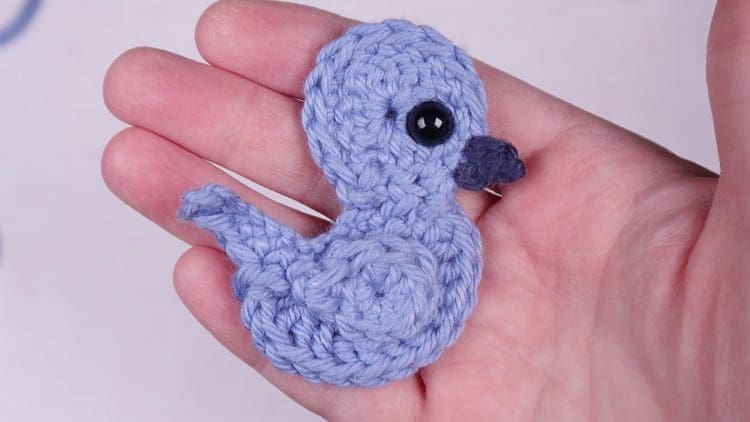
This simple bird applique is very easy to crochet, it just looks complicated. It can be a bit fiddly though. But don’t worry, I also made a video tutorial to walk you through the process step by step.
Did you know?: The size of your hook will greatly affect how large or small your bird is without even changing yarn size or pattern. I used a Size G hook for my appliqué bird.
For this project you will need:
- #4 worsted weight yarn in medium blue. I used “I Love This Cotton” brand yarn in the color “Stone Wash”.
- #4 worsted weight yarn in dark blue. I used “I Love This Cotton” brand yarn in the color “Dark Denim”. (You really don’t need much of this yarn at all, because it’s only for the beak. So if you have any left over blue yarn in your stash, you can use that.)
- A crochet hook. I used an G/6 4.25 mm hook.
- Scissors
- Yarn needle for weaving in the yarn tails.
Crochet Bird (Head and Body)
- Make a magic circle (or chain four and slip stitch into first loop to make a circle)
- Chain 3 (counts as first DC)
- Make 15 DC into the circle (since we’re counting the first chain 3 as a DC you’ll have a total of 16 DC (this is the bird head)
- Slip stitch into first DC (remember that’s the chain 3 we’re pretending is a DC) and pull tight the center of your magic circle.
- Now chain 12 and turn. (So now you’re working back down the chain you just made.)
- HDC in 3rd stitch from the hook.
- SC into the next 9 stitches. (until you reach the bird head)
- Slip stitch into 2 stitches on the bird head and turn. (Now you’re going to be working back down the body again.)
- Skip 2 stitches and in the 3rd SC down the body you’re going to make 6 DC in that same stitch.
- Skip one stitch and slip stitch into the next 3 stitches. And turn again (now we’re working our way back towards the head).
- Skip 2 stitches and make 3 DC into the 3rd stitch.
- Make 2 DC into the Next 5 stitches.
- Slip stitch into the first stitch in the head and then SC around the whole head of the bird working your way back to the top of the body on the other side. Slip stitch into the last stitch and fasten off.
Bird Beak
You can decide where you want to place the beak. I decided to skip one stitch at the edge of the body and start in the next stitch.
- Slip stitch into the head of the bird where ever you want the beak to be.
- SC into the next stitch.
- Chain 1
- Fasten off (that was easy, right?)
Bird Wing
- Make a magic ring (or chain 4 and slip stitch into the first stitch).
- Make 8 HDC into the ring.
- Slip stitch into first HDC and pull your magic circle closed.
- HDC into the first stitch and chain 1 then fasten off. (almost as easy as making the beak, right?)
You can make one or two bird wings, depending on how you want to stylize your bird.
Finishing the Bird
You can add a button or bead for the bird’s eye or use yarn or embroidery thread to make the eye instead.
Your bird is now ready to be stitched onto the object of your choice. I recommend using a yarn needle and the same color yarn if your stitching it onto a crochet project or using needle and thread in a similar color if you are sewing it onto fabric.


