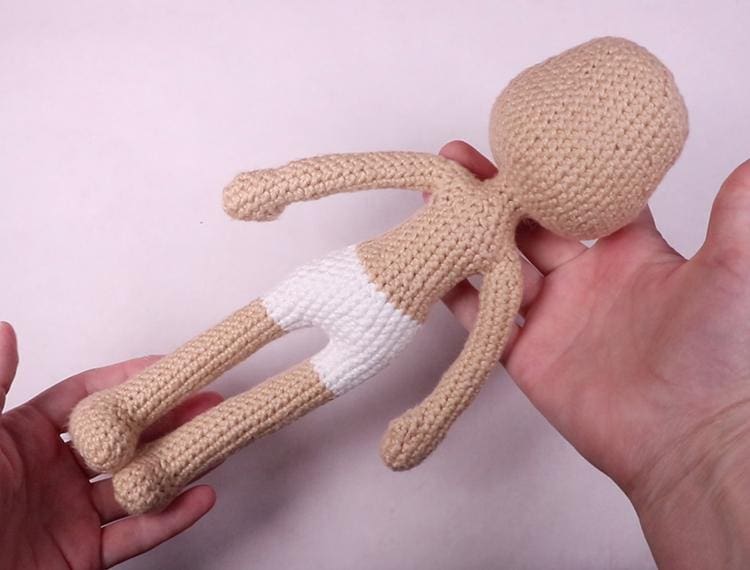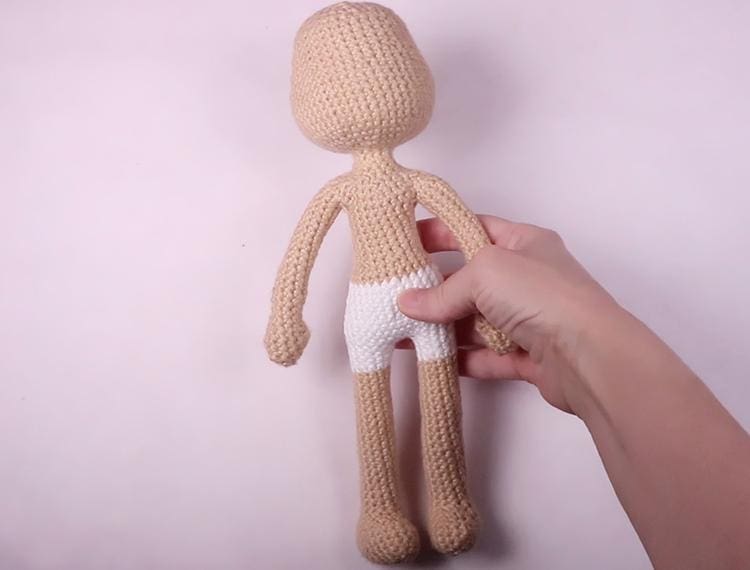
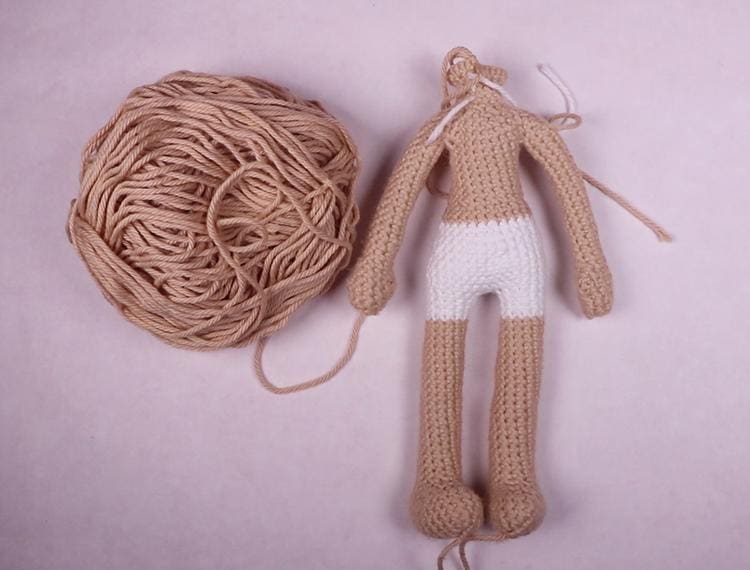
This is a basic amigurumi crochet doll body that can be used to make any gender you want. I also gave this sweet little doll left and right feet because I think it’s a fun “realistic” touch. Dolls have left and right hands, so why not feet too, right?
This pattern It’s worked from the bottom up and there is absolutely no sewing involved. You can add eyes if you’d like, during the crochet process, but I added my eyes after the doll was completed so that I could also do some face sculpting.
For this project you will need:
- Yarn: #4 worsted weight in a skin tone and a separate color for the undergarment. I used “I Love This Cotton” in the color “Taupe” for the skin tone and “White” for the undergarments.
- Crochet hook: I used E/3.5-4 mm hook
- Scissors
- Yarn needle
Basic run-down on how the doll is constructed.
We’ll start by making the arms and legs then we’ll make the body from the bottom up and connect the legs. We’ll continue making the body then join the arms at the shoulders. The neck and head will follow. For stuffing I used poly-fil and poly-fil beads. But, you can omit the poly-fil beads if you don’t want a weighted doll. And, of course, we’ll stuff the doll as we go.
Okay, let’s get started.
Basic Amigurumi Crochet Doll Instructions
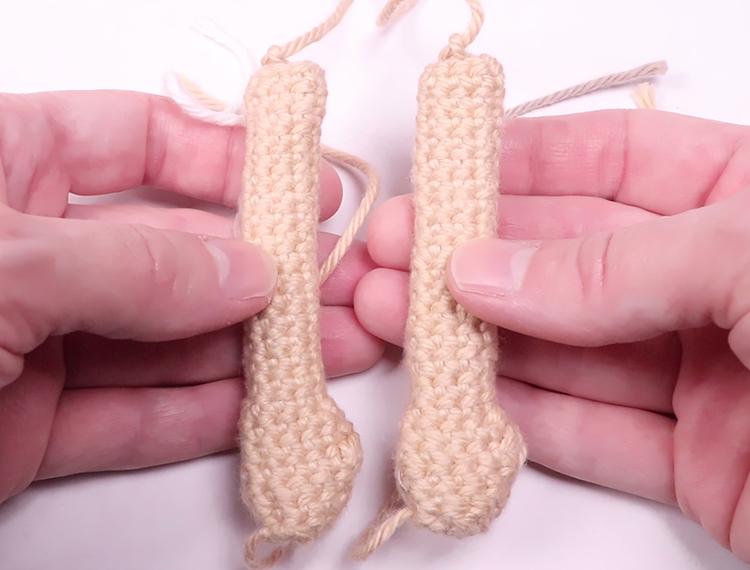
Arms
The arms are crocheted by making a magic circle and crocheting in a continuous round. This means there is no slip stitching at the end of the round we just start working the next round seamlessly. It is highly recommended that you use a stitch marker to mark the end of each round. I used a scrap piece of yarn but you can use anything you’d like. See my post on Stitch Markers here.
1. Make a magic circle and crochet 6 SC into the circle.
2. Insert your hook into the first SC from the first round and make a single crochet into each of the next 2 stitches. In the third stitch make an increase. Repeat the pattern of 2 single crochets and 1 increase until the last stitch (you should now have 8 stitches)
Increase Instructions: Make 2 single crochets into one stitch.
3. For this round we’re going to make a single crochet in each of the next 3 stitches then make an increase in the 4th stitch. Repeat this pattern until the end of the round. (10)
4. Make a single crochet into each stitch. Repeat this pattern until the end of the round. (10)
5. Now we’re going to make our little doll’s thumb.
Make a single crochet in each of the next 4 stitches.
In the 5th stitch make 1 Dc3Tog.
DC3Tog Instructions: Yarn over, insert your hook, pull the yarn through. Yarn over, pull through two. You should have two loops on your hook. Yarn over, insert your hook in the same stitch, pull the yarn through. Yarn over, pull through 2. You should have 3 loops on your hook. Yarn over, insert your hook in the same stitch, pull the yarn through. Yarn over, pull through 2. You should have four loops on your hook. Yarn over and pull through all four loops.
Then single crochet into each of the next 5 stitches to complete this round.
6. At this point you can add some poly-fil stuffing to your arm.
7. This is our first decrease round.
Make a single crochet into each of the next 3 stitches and in the 4th stitch make 1 invisible decrease.
Invisible decrease instructions: insert your hook into the front loop only of the next stitch and then the front loop only of the stitch right after it. You should have three loops on your hook. Pull the yarn through those two stitches, leaving one loop on your hook. Then yarn over and pull through the two remaining loops on your hook. This can be a little tricky but it’s well worth the effort.)
8. Now make 18 rounds of single crochets in every stitch to make your arm.
You can stuff your arm as you crochet. Just add a little bit of poly-fil every so often. Be careful not to over-stuff.
When you’re finished crocheting your rows, fasten off and leave a small tail of yarn to weave into your work later.
8. Of course, you’ll have to repeat these steps so that you have two arms. There is no difference between the left and the right arm, since you’ll just be turning one arm around to make the thumb point in the opposite direction.
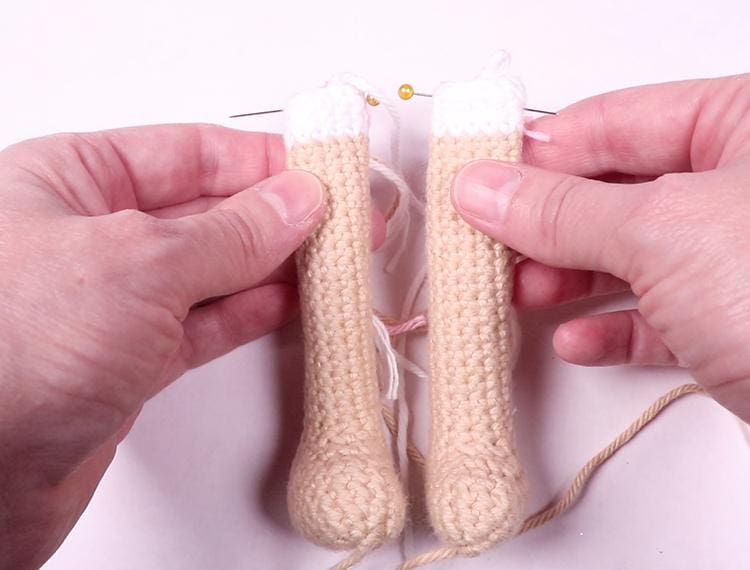
Left Leg
There is a difference between the right and left legs so be sure that you don’t just make two left legs. If you do you’ll end up with two feet pointing in the same direction, and we don’t want that.
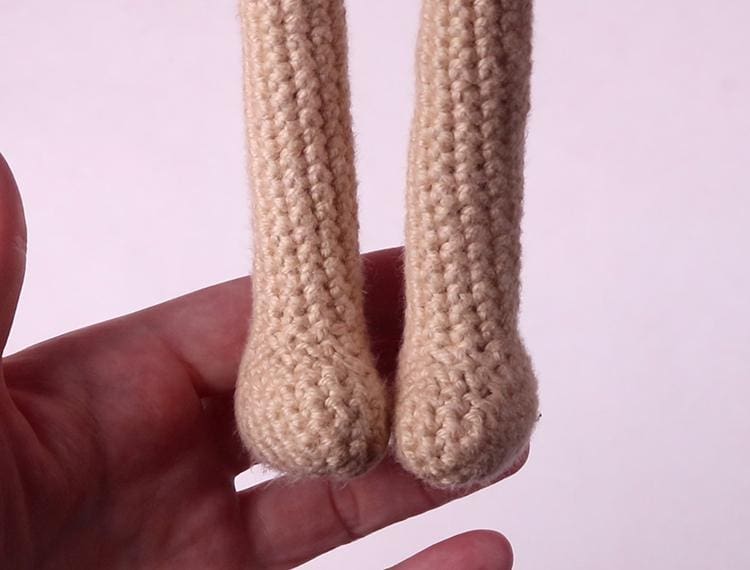
The legs are not started with a magic circle, but instead with a row of chains then we single crochet around that chain in a circle. This will make up the sole of the foot. Make sure to use a stitch marker.
1. Make a chain of 8.
2. Insert your hook into the 2nd chain counting backwards from your hook (the loop on your hook does not count as a chain).
Make a single crochet in each chain for 6 chains.
In the 7th chain make a 3 in 1 increase (3 single crochets into one chain).
Continue working around the original chain so that now you are going in a circle around it, make a single crochet in each of the next stitches then a 3 in 1 increase to complete this round.
You should have an oval. It’s very similar to how a crocheted rug looks in the beginning. (You should have 18 stitches around)
3. Make a single crochet into each of the next 8 stitches and then an increase in the 9th stitch. Repeat this pattern until the end of the round. (20)
4. Single crochet into the first 9 stitches and then increase in the 10th stitch. Repeat this pattern until the end of the round. (22)
5. Single crochet into every stitch in this round. (22)
6. This round begins with 1 decrease, then single crochets in the next 7 stitches, 1 decrease, then 11 single crochets (20)
7. Single crochet into each of the next 5 stitches, then make 5 decrease stitches, then single crochet into each of the next 5 stitches (15)
8. Make a single crochet into each of the next 4 stitches. Then 3 decrease stitches and then single crochet into each of the next 5 stitches. (12)
9. Make a single crochet into every stitch for 4 rounds.
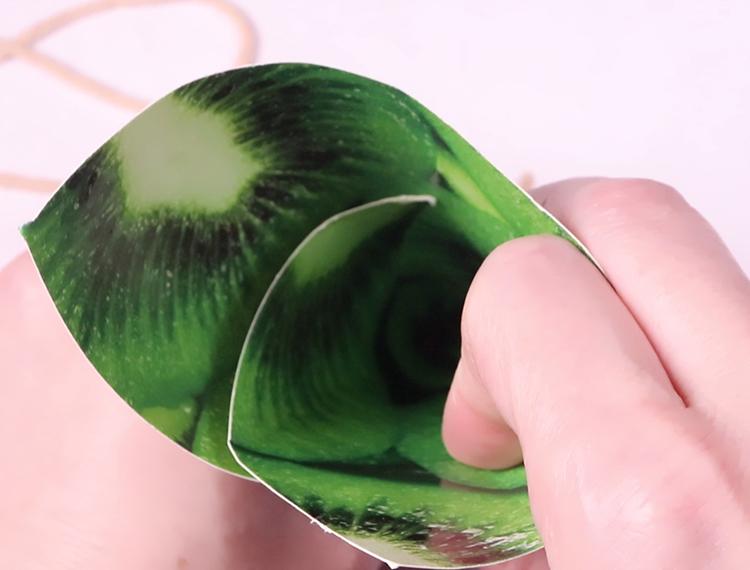
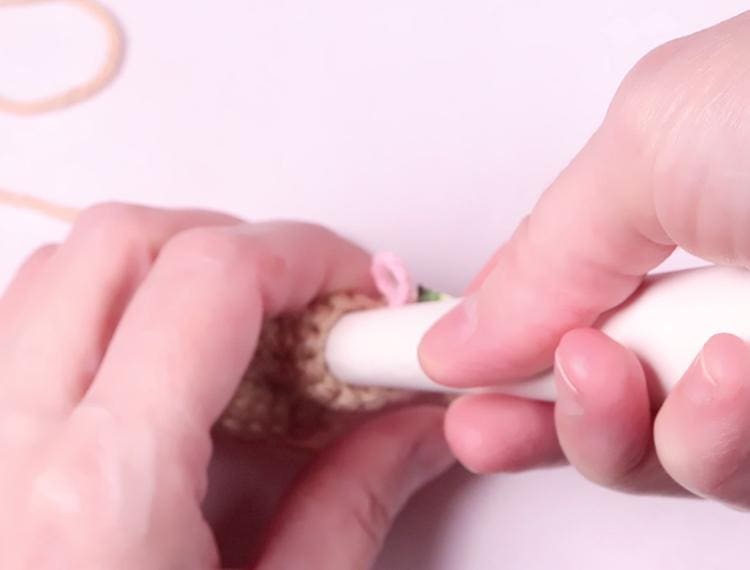
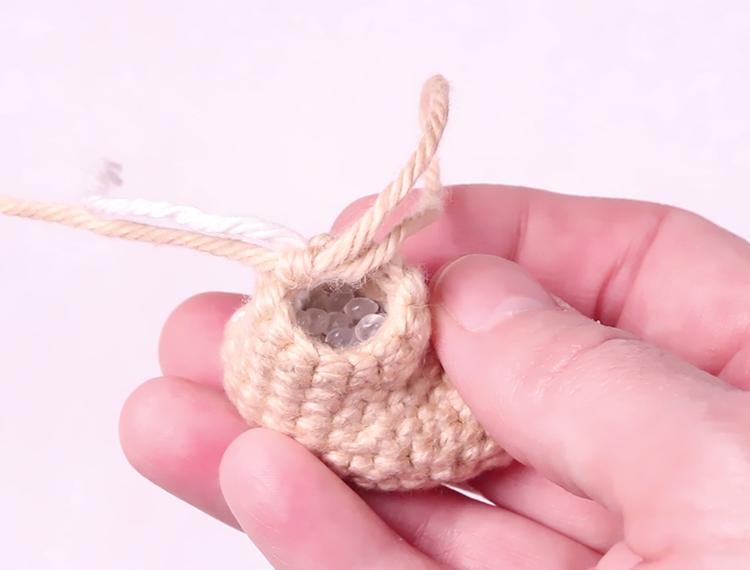
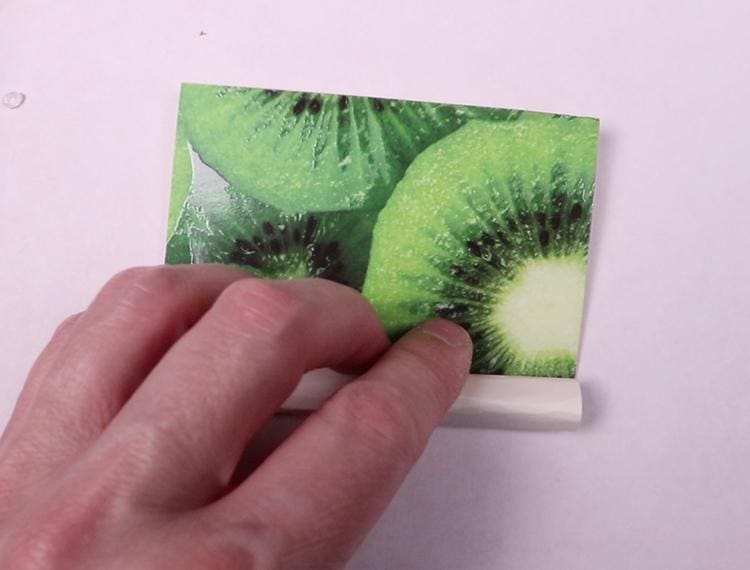
10. This is where we’re going to add some poly beads and stuffing before we go any further.
I made a little funnel with some old scrapbook paper and I added poly-beads to the foot. Then I topped it with some poly-fil stuffing and continued on to the next step.
11. Now we’ll make a single crochet into every stitch for 13 rounds. Remember to stuff with poly-fil as you crochet.
12. At the end of the 13 rounds you’re going to loop in white, slip stitch into the next chain and then make a single crochet into every stitch for 3 rounds. Fasten off and leave a small yarn tail.
Right Leg
To make the legs look left and right, you’ll notice that some of the rounds are mirrored this makes it so the feet point in the opposite direction.
You can’t simply make another left leg, since this pattern makes the feet point slightly to the side. If you just made two left legs you would end up with two feet pointing in the same direction. Although wouldn’t it be a funny gag gift to give to someone who can’t dance? Get it? Two left feet?….lol
Okay back to work….
Just a side note: The right leg starts to have different instructions from the left leg beginning with step 3.
1. Make a chain of 8.
2. Insert your hook into the 2nd chain counting backwards from your hook (the loop on your hook does not count as a chain). Make a single crochet in each chain for 6 chains.
In the 7th chain make a 3 in 1 increase (3 single crochets into one chain).
Continue working around the original chain so that now you are going in a circle around it, make a single crochet in each of the next stitches then a 3 in 1 increase to complete this round.
You should have an oval. It’s very similar to how a crocheted rug looks in the beginning. (You should have 18 stitches around)
3. Make an increase stitch in the first stitch then single crochet into each of the next 8 stitches. Repeat this pattern until the end of the round. (20)
4. Make an increase stitch in the first stitch then single crochet into each of the next 9 stitches. Repeat this pattern until the end of the round. (22)
5. Single crochet into every stitch in this round. (22)
6. Make a single crochet into each of the next 11 stitches, then make 1 decrease stitch, then single crochets in the next 7 stitches, and make another decrease stitch. (20)
7. Single crochet into each of the next 5 stitches, then make 5 decreases, then single crochet into each of the next 5 stitches (15)
8. Make a single crochet into each of the next 5 stitches. Then 3 decrease stitches and then make a single crochet into each of the next 4 stitches. (12)
9. Make a single crochet into every stitch for 4 rounds.
10. This is where we add poly beads and stuffing.
11. Now we’ll make a single crochet into every stitch for 13 rounds. Remember to stuff with poly-fil as you crochet.
12. At the end of the 13 rounds you’re going to loop in white, slip stitch into the next chain and then make a single crochet into every stitch for 3 rounds. Fasten off and leave a small yarn tail.
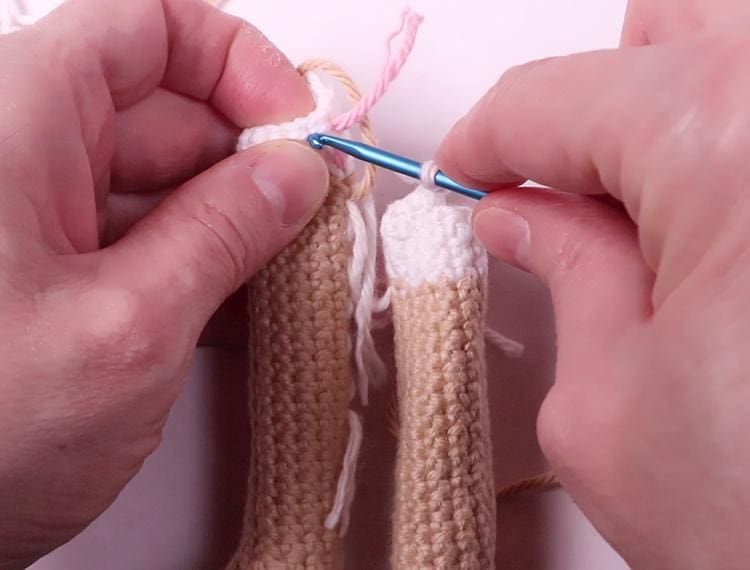
Doll Body and Connecting the Legs
The bottom of the doll body begins by connecting the legs.
1. Start with the left leg. Straighten the seams on the leg so that it’s not twisted to the side (this tends to happen as we work). Pinch together the top of the leg and mark with a straight pin (or stitch marker) the center stitch on each side.
2. Repeat step one for the right leg.
3. Insert your hook back into the loop for the right leg and using the white color for the undergarments, single crochet into each stitch and into the stitch you pinned as the center inside seam, then chain 2.
Note that you may end up having to single crochet into more or less stitches than me. You may have 5 stitches to the center or 3 stitches to the center. It just depends on how you crocheted you piece and there is no right or wrong number. It may even be different each time you make the doll.
4. Now single crochet into the pinned stitch in the left leg and single crochet around the left leg (12 stitches).
Single crochet into the 2 chain stitches between the legs.
This brings you to the right leg again, where you will single crochet around until you reach the last stitch around the leg. I had already crocheted 4 stitches in this leg, so I had 8 stitches left. How ever many stitches you crocheted in this leg, subtract that number from 12 (there are 12 stitches in each leg) and that’s the number of stitches you have left in this round.
Or you could just crochet until you reach the end and forget about the math at this point, since it doesn’t matter, lol. Just single crochet in every stitch until you reach the end. (You should end up with 28 stitches in this round).
3. Now we’ll single crochet into each of the next 6 stitches, then make one increase stitch in the 7th stitch. Repeat this step until you reach the end. (32)
4. Single crochet in every stitch for 3 rounds. (32)
5. Single crochet into the first 6 stitches, then make a decrease stitch. Repeat this pattern for this round. (28)
6. Single crochet into every stitch for 2 rounds. (28)
7. You can add some poly-fill stuffing here.
8. Make a single crochet into the first 5 stitches, then make a decrease stitch. Repeat this pattern for this round. (24)
At this point, close up the last decrease by looping in the skin tone.
9. Single crochet into every stitch for 3 rounds. We will be using our skin tone for the rest of the doll. (24)
10. Single crochet into each of the next 2 stitches, then make a decrease stitch. (18)
11. Single crochet into each stitch for 4 rounds.
12. Single crochet into the first 8 stitches, then increase in the 9th stitch. Repeat this pattern for this round (20)
13. Single crochet into every stitch for this round. (20).
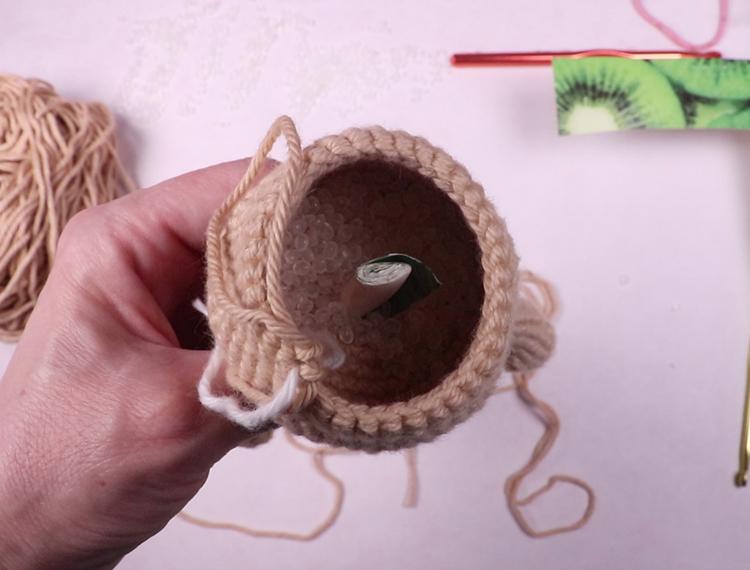
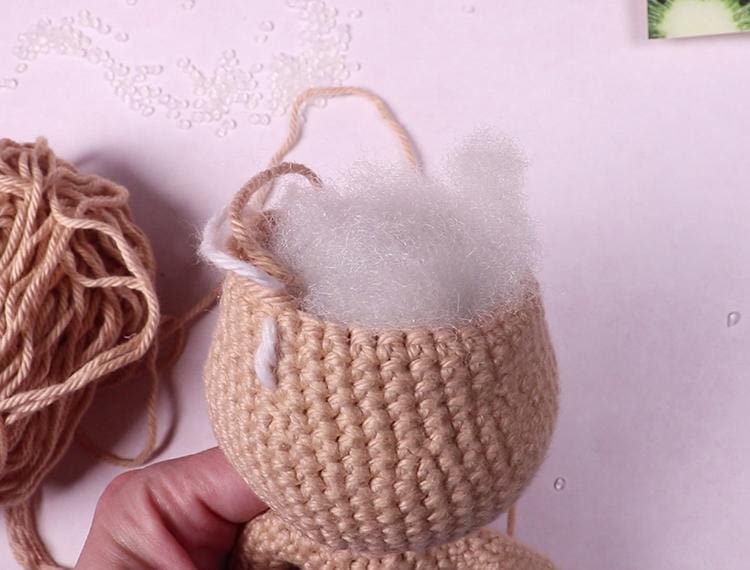
14. Add a little bit more stuffing to your doll but be careful not to overstuff. We need to leave room for the neck stabilizer that we will be adding later. (spoiler warning: our neck stabilizer is a rolled up piece of scrapbook paper)
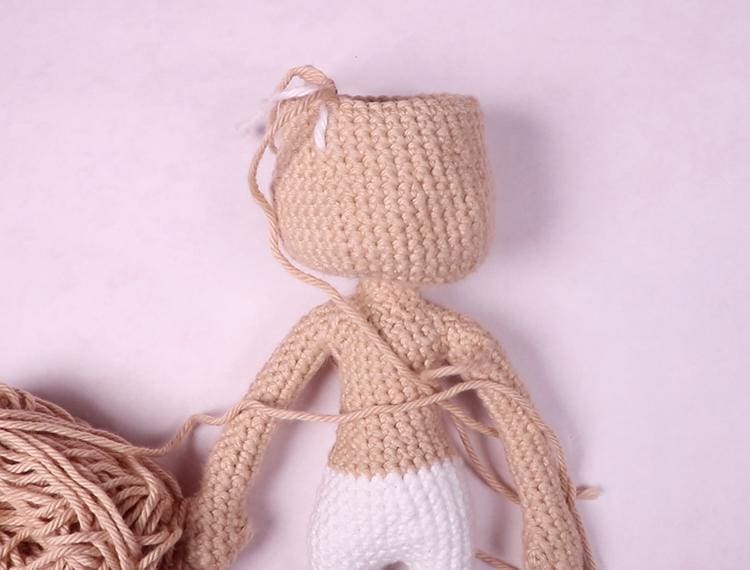
Connecting the Arms and Making the Shoulders, Neck and Head.
1. Just like with the legs, we need to straighten the seams of the arms and pin the center sides.
2. We also have to straighten the stitches on the body and pin the center sides.
3. Before attaching the arms make sure you have the left and right on the correct side. An easy way to remember is, the thumb of each arm should be closest to the body.

4. Insert your hook into the loop on your doll body and single crochet in every stitch until you reach your pinned stitch around the back until you reach your pinned stitch. Make a single crochet into your pin marked stitch.
Then single crochet into the pin marked stitch on the right arm.
Single crochet around the back of the right arm until you reach the last stitch in the front.
Then single crochet into the the body.
Single crochet across the front of the body and into the stitch right before the pinned center in the left arm.
Crochet around the left arm and then into the pinned center of the left arm and into the pinned center of the body. Crochet until you’ve completed the round.
5. Now that we have our arms connect to the body, we can start our next round.
Single crochet into the next 4 stitches, then make a decrease stitch. Repeat this pattern until the end of the round.
6. Single crochet in the next 2 stitches then make a decrease stitch. Repeat this pattern until the end of the round.
7. This round is exactly like step 6. Single crochet in the next 2 stitches then make a decrease stitch. Repeat this pattern until the end of the round.
8. Single crochet in the next stitch, then make a decrease stitch. Repeat this pattern until the end of the round.
9. Single crochet into the next 3 stitches, then make a decrease stitch. Repeat this pattern until the end of the round.
10. Now we’ll single crochet into every stitch for 3 rounds.
11. Increase into every stitch in this round. This will double your stitch count.
12. Single crochet into the first stitch, increase into the 2nd stitch. Repeat this pattern until the end of the round.
13. Single crochet into every stitch in this round.
14. Single crochet into the first 2 stitches, increase into the 3rd stitch. Repeat this pattern until the end of the round.
15. Single crochet into every stitch for 8 rounds.
16. Single crochet into the first 4 stitches, then make a decrease stitch. Repeat this pattern until the end of the round.
17. Single crochet into every stitch in this round.
18. Single crochet into the first 7 stitches, increase in the 8th stitch. Repeat this pattern until the end of the round.
19. Single crochet into every stitch for 4 rounds.
20. This is a great time to decide if you want to use safety eyes. You should consider inserting them now if that’s what you want to do. I didn’t use safety eyes for this doll.
Sorry I gotta get on my soapbox here…
Remember safety eyes are great for dolls and plushies made for children. But they can still be a choking hazard. It’s best to skip the safety eyes and embroider or use felt instead if a child is still prone to putting toys in their mouth.
And safety eyes are an absolute no-no for our little four legged friends since they absolutely will put things in their mouth.
NEVER use safety eyes on dolls made for babies, toddlers or pets.
Okay back to our project…
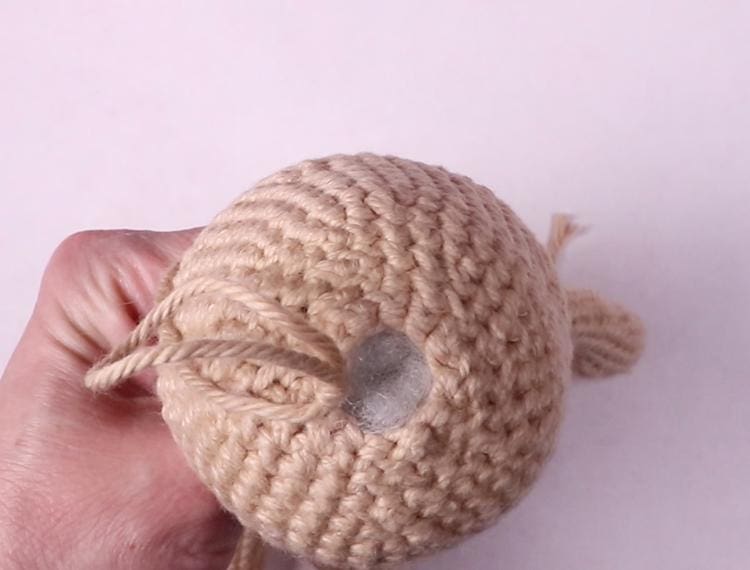
20. To add stability to the neck of the doll I added a rolled up piece of old scrapbook paper. This particular scrapbook paper was a thick card stock type. I cut it so that it was long enough to stick into the body of the doll, through the neck and then a good portion of the way into the head. This prevents the doll from having a floppy neck.
20. Single crochet into the first 4 stitches then make a decrease stitch. Repeat this pattern until the end of the round.
21. Single crochet into the first 3 stitches, then make a decrease stitch. Repeat this pattern until the end of the round.
22. Single crochet into the first 2 stitches, then make a decrease stitch. Repeat this pattern for 3 rounds. Then stitch the top of the head closed.
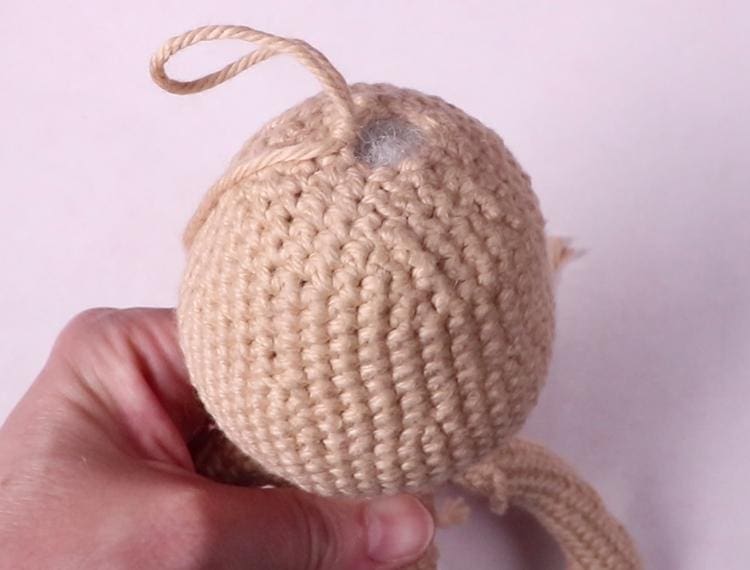
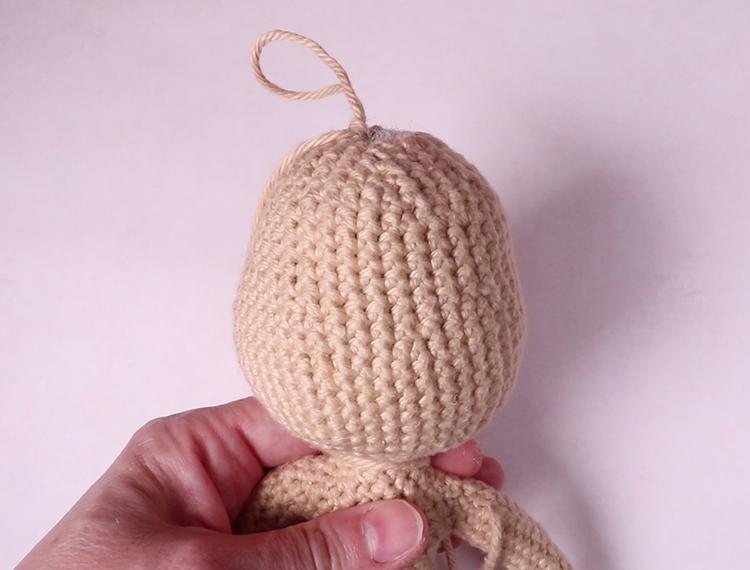
And that’s it! Now you can add eyes, sculpt the face and add hair. This is a basic body so you can make this doll any gender you’d like.