This Christmas lights crochet stitch is so adorable when finished. It can be used as a border on sweaters, blankets or hats. Or crochet this stitch in rows to make a unique design.
This pattern uses two stitches: the half double crochet (HDC) and the double crochet 5 together stitch (DC5TOG). It’s actually a very simple design with beautiful results.
Disclaimer: Some of the links below are affiliate links. This means that, at zero cost to you, I will earn an affiliate commission if you click through the link and finalize a purchase. Please see my Affiliate Disclosure page for more details.
For this project you will need:
1. Yarn in at least 3 colors.
The amount of yarn colors you need, depends on how many different colored lights you want to have. I used 5 colors for my sample project below. One main background color, three colors for the lights, and one color for the cord/string.
I used peaches and cream yarn 100% cotton yarn for my sample.
2. Crochet Hook
I used an H/8 5.00 mm crochet hook for the sample.
3. Scissors
4.Yarn needle
Christmas Light Crochet Pattern Instructions
The following is to make a small sample to learn the stitch.
This crochet pattern can be as long as you want just make sure your initial chain is a multiple of 3 plus 4.
For my small sample, I made 12 chains (a multiple of 3) plus 4 more to total 16 chains.
- Chain 16 with your main color. My main color was white.
- In the second stitch from the hook work your first half double crochet. (Please note we do not count the loop on the hook as a chain).
- Continue making half double crochets in every stitch down the row.
- Once you reach the end of the row chain 2 and turn your work.
- In the first stitch make a half double crochet. Continue making half double crochets in every stitch down the row. Chain 2 and turn your work
- Now in this row we’ll start making our Christmas lights. Make a half double crochet in the first stitch and repeat in the second stitch.
- Loop in your first color. In my sample I used red. Cut the main color yarn (leaving a tail) and tie the tail of the first color with the main color tail in the back. Then make a double crochet 5 together in the next stitch with your first color.
- Cut the first color leaving a tail. Loop in the main color. Tie the first color with the main color in the back. In the next two stitches make a half double crochet in each stitch with the main color.
- Repeat steps 7-8, switching out colors until you reach the end of the row. You will end the row with your main color in the last two stitches. chain 2 and turn your work.
- Make a half double crochet in each of the first two stitches.
- At the top of the Christmas lights you will only make one half double crochet. You will have to skip stitches. Make half double crochets in two stitches between the Christmas lights. Once you reach the end chain 2 and turn your work.
- Make another row of half double crochets. When you reach the end tie off and cut the yarn.
- At this point you should tidy up the strings in the back. Tie everything securely then work the ends into your work or simply cut the strings, whatever you prefer.
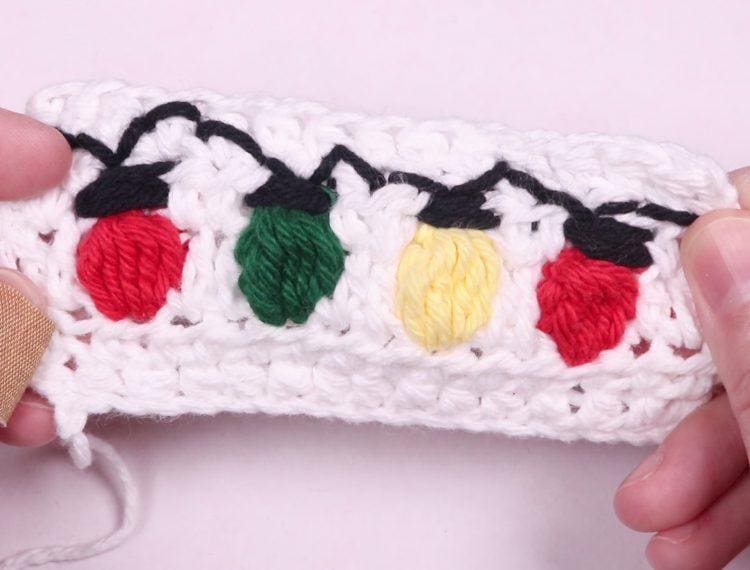
- Using a back stitch, weave your black yarn across the top of the Christmas lights in a wave, dipping at each light then back up again in between. This will make the cord for the lights.
- After you make your cord, use the black yarn to stitch back and forth on top of each light to make a rectangle for the light connector.
And that’s it! This pattern is really simple but using multiple colors makes it a little bit tricky. The end result is really adorable though!
Watch the video below for a step by step demonstration. If you’d like to watch the left handed version instead click here.


