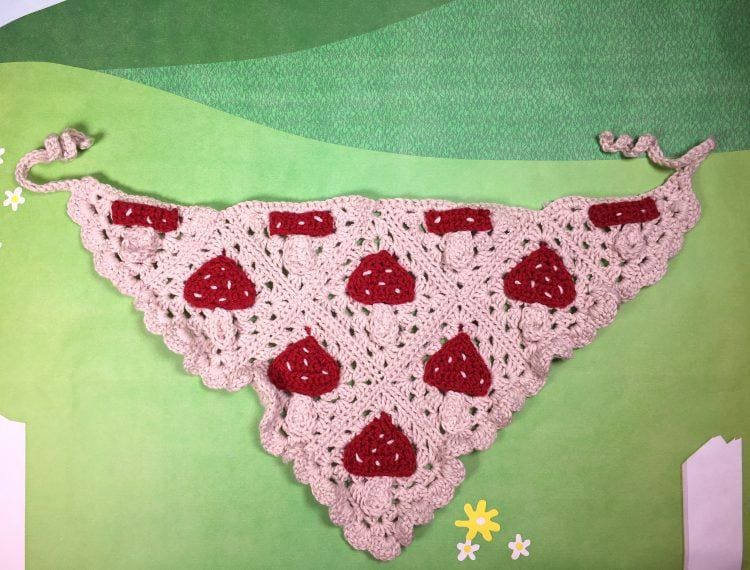
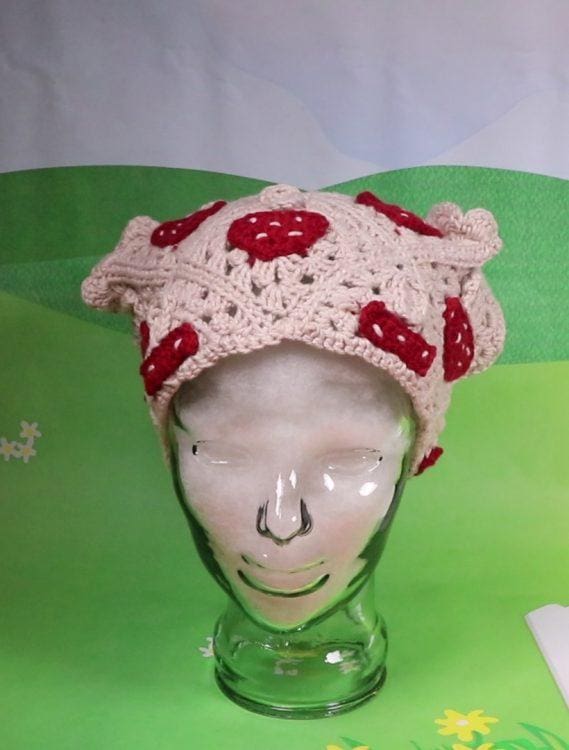
This is a cute and trendy magic mushroom kerchief, aka bandana, crochet pattern. The pattern is beginner friendly and makes an adorable accessory to wear this spring and summer.
For this project you will need:
1 1/2 – 2 skeins of cream/off-white yarn size 4 worsted weight.
I used worsted weight 100% cotton and each skein had 180 yards.
About 1/2 skein of dark red yarn (size 4 worsted weight cotton 1 skein= 180 yards)
Size H/8 5 mm Crochet hook
Yarn needle
Scissors
Crochet Mushroom Kerchief pattern
This pattern consists of 10 granny squares, 5 granny triangles, 10 mushroom tops, 5 half mushroom tops and 15 mushroom bottoms. The magic mushroom kerchief is finished off with ties and a frilly border.
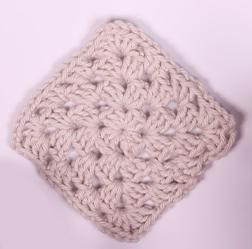
We’ll start by making 10 Granny Squares.
Round 1
1. Make a magic circle and chain 3 (counts as your first double crochet)
2. Make 2 double crochets into the ring and chain 3.
3. Make 3 double crochets and chain 3. Repeat making 3 dc and ch 3 three more times. That brings us to the end of the round, you should have 4 sets of 3 double crochets and your work should look like a square. To complete the round, just slip stitch into the first chain.
Round 2
1. chain 4 (counts as first dc plus ch 1)
2. Now we’re going to work into the first chain space corner of first round down below. We’re also going to make our first corner of this round.
To do this, make 3 double crochets and chain 3. Then in this same chain space make 3 double crochets and chain 1.
4. For the next two corners, we will repeat step 3.
5. For the last corner make 3 double crochets, chain 3, make 2 more double crochets and then slip stitch into the third stitch of the first chain.
Round 3
1. Chain 3 (counts as first double crochet)
2. Make 2 double crochets into the first chain space from the round below and chain 1.
3. Next we’ll be working into our first corner so we’ll make 3 double crochets, chain 3, make 3 more double crochets and chain 1.
4. Make 3 double crochets into the next chain space from the last round below and chain 1.
5. Time for another corner: 3 dc, ch3, 3dc, ch1.
6. Repeat steps 4-5 until the end of the round where you’ll slip stitch into the third stitch of the first chain.
Round 4
1. Chain 4 (counts as first dc plus ch 1)
2. In the first chain space, make 3 dc and ch 1.
3. Go to first corner chain space and make 3 dc, ch3, 3dc, ch 1.
4. In next chain space: 3 dc, ch 1.
5. Repeat step 4.
6. Repeat steps 3-5 until the last chain space where you will make 2 dc and slip stitch into the third stitch of the first chain.
7. Fasten off by chaining one and pulling enough yarn to leave a tail. Cut the yarn and pull tight.
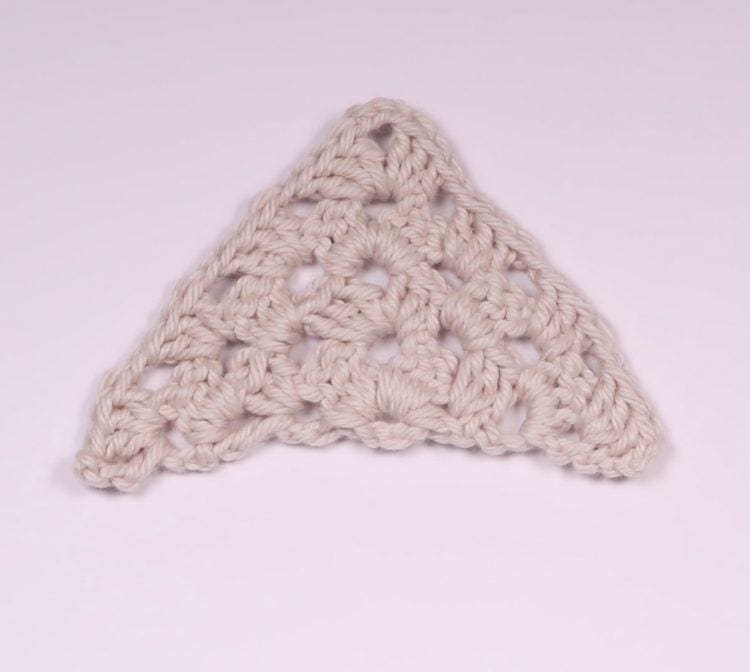
Now we’ll make 5 Granny Triangles.
Row 1
1. Make a slip knot and Chain 5 and slip stitch into the first chain. This makes your circle.
2. Chain 4 (counts as first dc and ch 1)
3. Into the chain circle we will make 3 dc, ch 3, 3 dc, ch1 and then 1 dc.
4. Turn your work.
Row 2
1. Chain 4.
2. In first chain space below: 3 dc and ch 1.
3. The next ch space below is a corner space, so just like when we made the granny squares, in this space we will make: 3 dc, ch 3, 3 dc, ch1.
4. In the last chain space below, 3 dc, ch1, 1dc.
5. Turn your work.
Row 3
1. Chain 4.
2. In first chain space below: 3 dc and ch 1.
3. In next chain space, 3 dc, ch 1.
4. The next ch space below is a corner space, so just like when we made the granny squares, in this space we will make: 3 dc, ch 3, 3 dc, ch1.
5. In the next space below, 3 dc, ch1.
6. In the last space below, 3 dc, ch1, 1dc.
7. Turn your work.
Row 4
1. chain 4.
2. In first chain space below: 3 dc and ch 1.
3. In next chain space, 3 dc, ch 1.
4. Repeat step 3.
5. The next ch space below is a corner space, so just like when we made the granny squares, in this space we will make: 3 dc, ch 3, 3 dc, ch1.
6. In the next space below, 3 dc, ch1.
7. Repeat step 6.
8. In the last space below, 3 dc, ch1, 1dc.
9. Fasten off by chaining one and pulling enough yarn to leave a tail. Cut the yarn and pull tight.
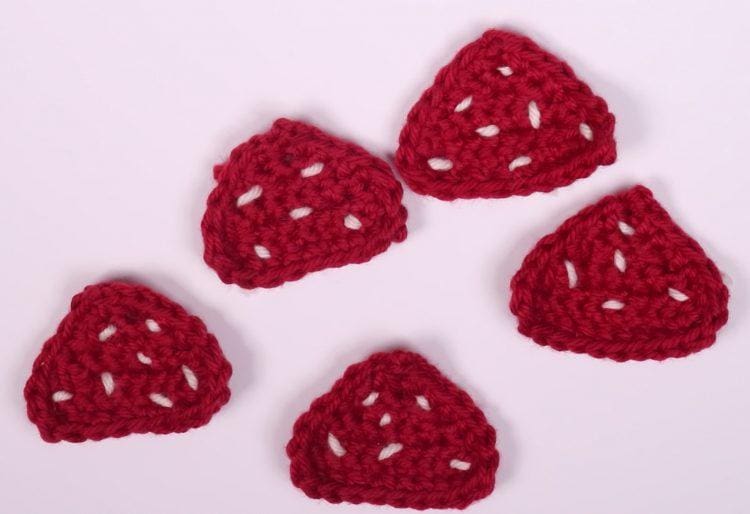
Full Mushroom Tops
1. Make a slip knot and chain 11.
2. Starting from the second chain from the hook, make 1 single crochet in each chain. At the end of the row, chain 1 and turn your work.
3. In the first stitch you will make a single crochet two together stitch (sc2tog): insert your hook in the first stitch and pull the yarn through, leave the loop on your hook and insert your hook into the next stitch and pull the yarn through (you should now have 3 loops on your hook). Now yarn over and pull through all three. This is how you do a single crochet two together stitch (sc2tog).
Make a single crochet in the each of the next 6 stitches and then another sc2tog in the last stitch. Chain 1 and turn your work.
4. In this row we’ll make a sc2tog, then 1sc in each of the next 4 stitches and another sc2tog in the last stitch. Chain 1 and turn your work.
5. Now we’ll make sc2tog, 1sc in each of the next two stitches and another sc2tog in the last stitch. Chain 1 and turn your work.
6. In this row we will make 2 sc2tog stitches. Chain 1 and turn your work.
7. And in the last row we’ll make just one sc2tog stitch.
8. The last step is to tidy up the perimeter of the mushroom. Make a single crochet in every stitch going around and make 2 single crochets in every corner.
9. Fasten off and work the tail of the yarn into your mushroom top with a yarn needle.
Half Mushrooms
Half mushrooms are made by following steps 1-3 and then stopping there and fastening off. We won’t go around the parameter of these mushrooms with single crochets. They are perfect just stopping here.

Mushroom spots
The mushroom spots are easy to make. Use a yarn needle and off white yarn to make small stitches representing spots by weaving in and out of the mushroom at random places. You can make as many spots as you want. I think 5-7 is a good number for most full mushrooms. And 3 spots works well for the half mushrooms.
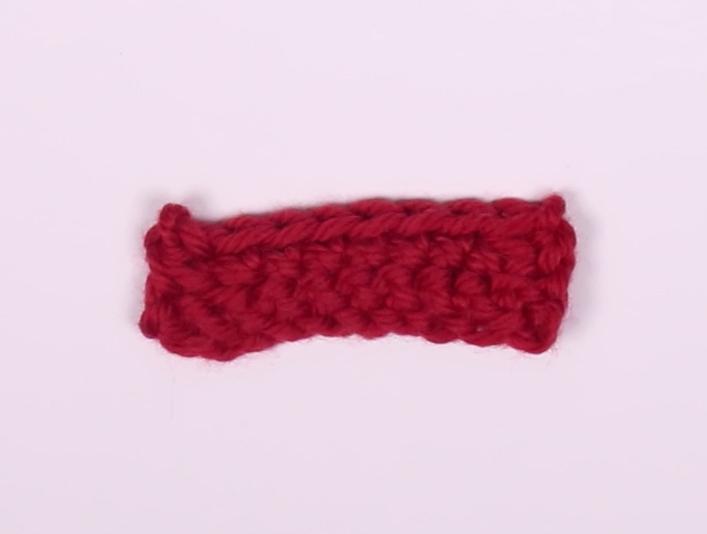
Mushroom Stalks
Mushroom stalks are made by first making a chain and then working down the chain as you normally would but after the last chain, we’ll start working up the other side, going in a circle around the original chain.
1. Make a slip knot and chain 8.
2. Working down the chain we’re going to start by making single crochets, then we’ll make increasingly larger stitches as we go down the row. This is going to make our stalk larger at the bottom and rounded out nicely.
So from the second chain from the hook make 1sc, 1sc, 1sc, 1hdc, 1hdc, 1dc.
In the last chain we’re going to make five stitches. All in the last chain: 1 dc, 3 hdc, 1 dc.
Now we’re going to continue going around the original chain and work back up to where we started by making 1 dc in the next stitch then 1 hdc, 1hdc, 1 sc, 1 sc, 1sc and fasten off.
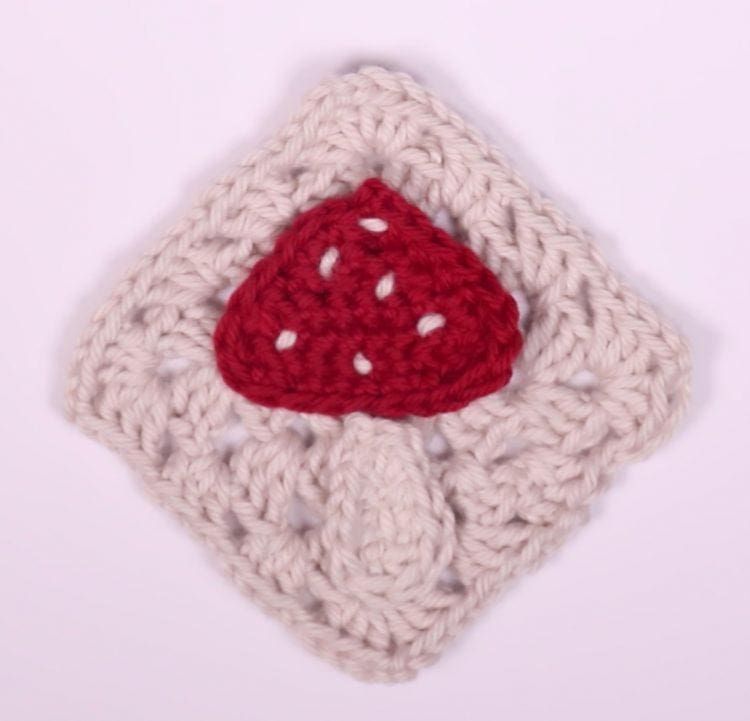
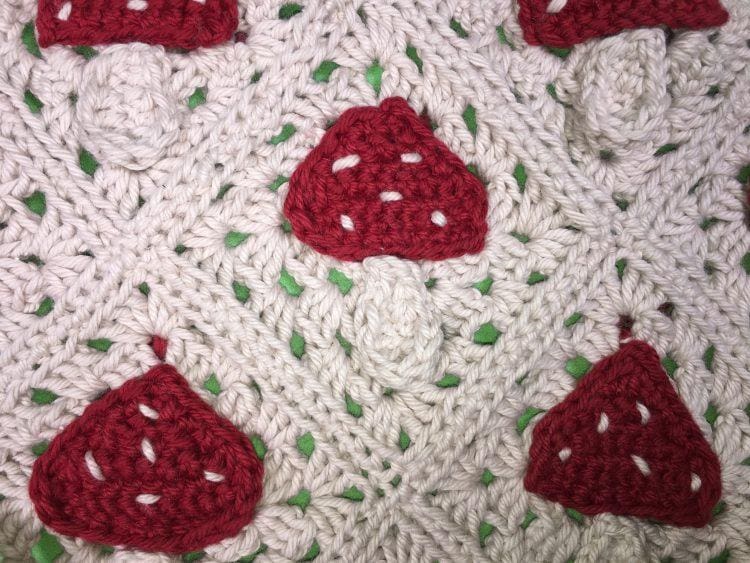
Sewing on the Mushroom tops and stalks.
1. Thread a yarn needle with the same red yarn you used to make the mushroom top.
2. Then take a granny square and lay it on the table. Position a mushroom top and a mushroom stalk on top of the granny square so that they are centered diagonally.
3. You can pin the pieces in place if you want. But if you don’t want to have to maneuver around the pins as you sew, you can do what i did. I simply removed the stalk and stitched the mushroom top to the granny square while holding it in place.
4. Re-center the stalk below the mushroom top and using the same yarn color as the mushroom stalk, sew it in place.
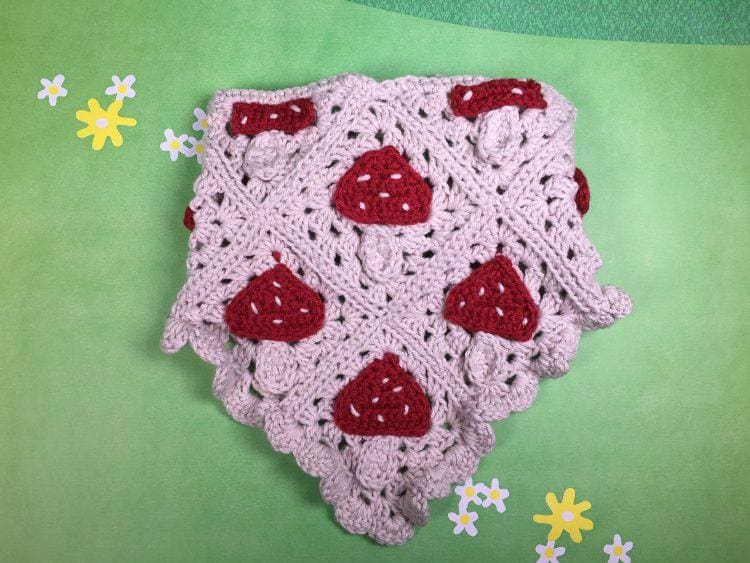
Magic Mushroom Kerchief Assembly
Use a blanket stitch (aka a whip stitch) to connect the pieces in the order you see above making sure to sew in the back loops only.
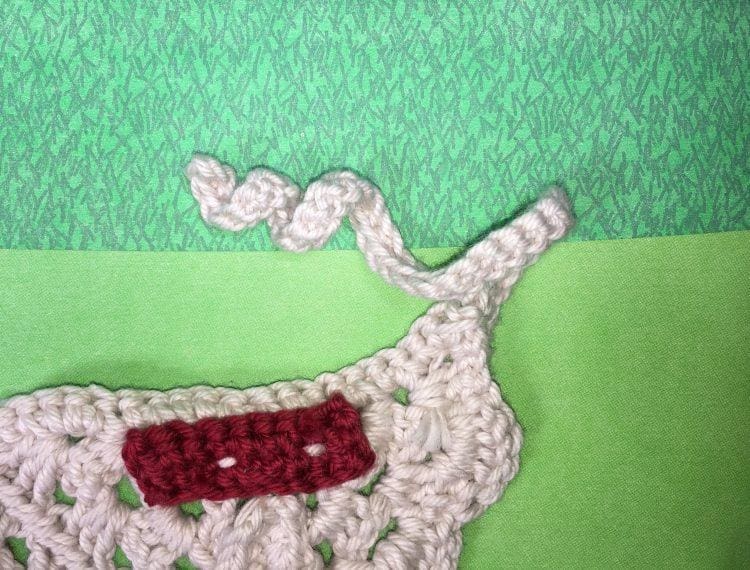
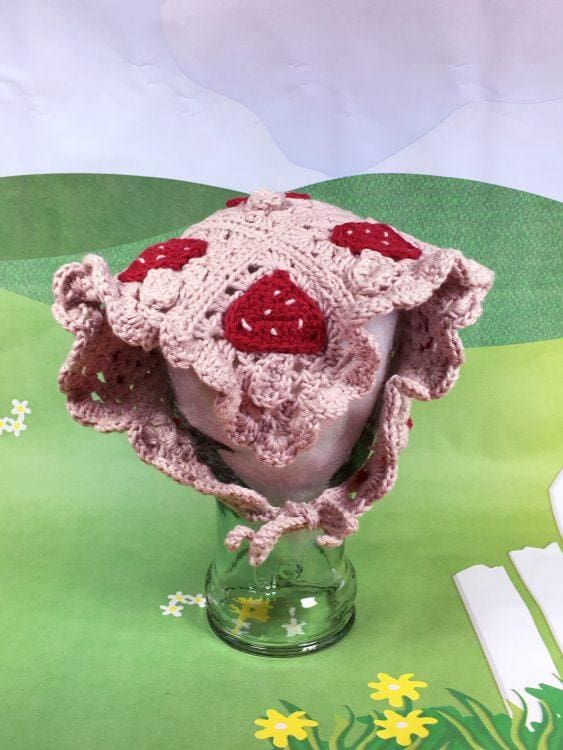
Magic Mushroom Kerchief Ties and Ruffle Edge.
1. Using the off-white color loop in at one color of the kerchief and chain 42.
2. In the second chain from the hook, single crochet into each stitch until you make your way back to the edge of the kerchief.
3. Slip stitch into the kerchief then sc in each dc and ch space across.
4. When you reach the end, chain 42.
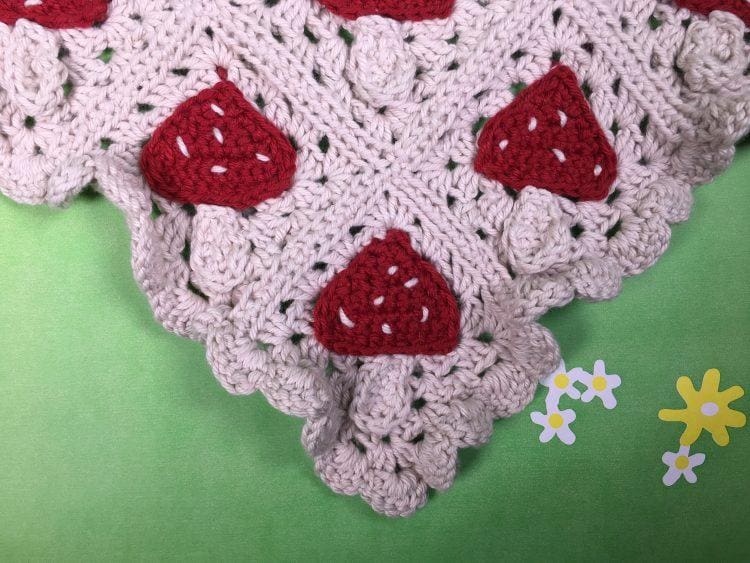
5. In the second chain from the hook, single crochet into each stitch until l you make your way back to the edge of the kerchief.
6. When you get back to the edge of the kerchief, make 3 dc in the first chain space and ch 1.
7. Skip one stitch and sc into the next st then ch 1.
8. Skip the next stitch then make 5 dc in the chain space.
9. Repeat steps 7-8 all the way around the magic mushroom kerchief until you reach the other edge.
10. In the last ch sp make 3 dc and sl st into tie edge.
11. Fasten off and your done!


