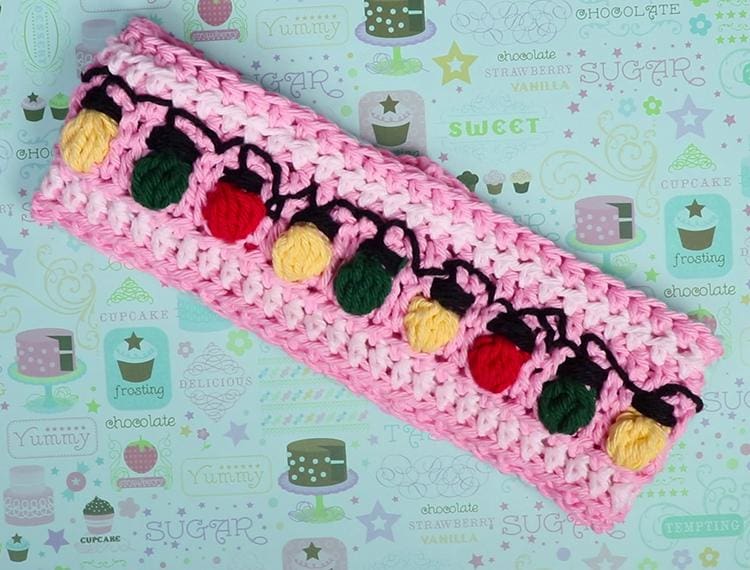
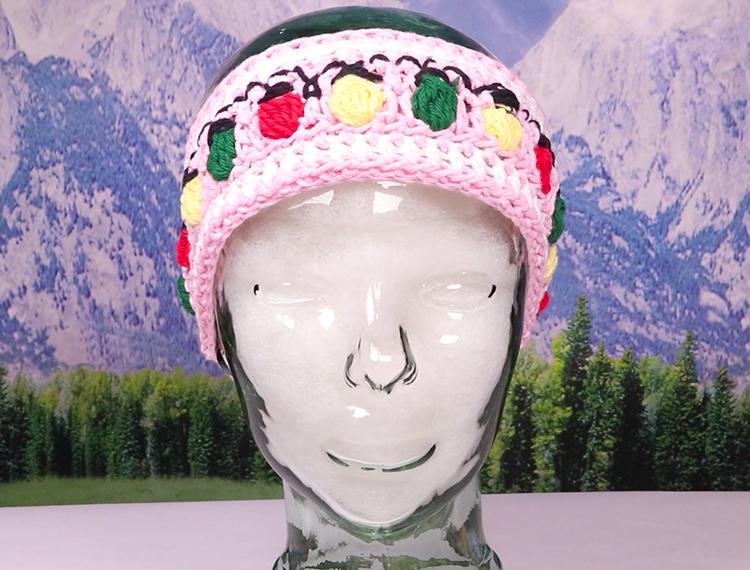
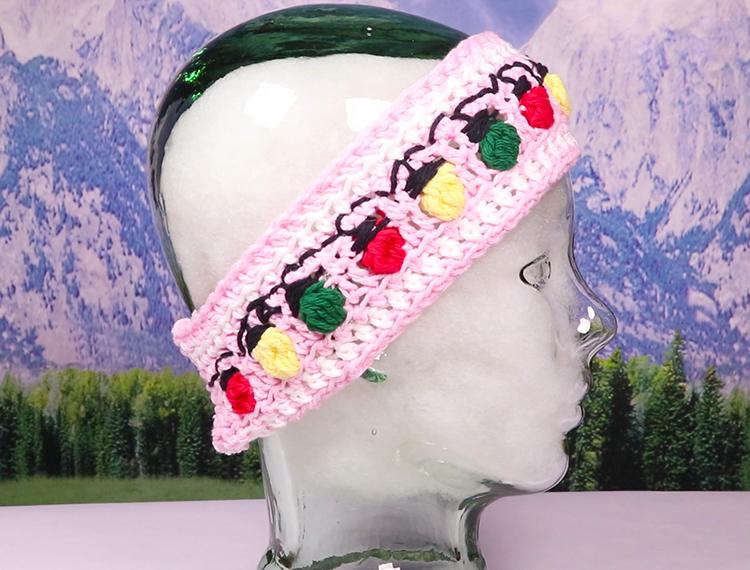
This crochet Christmas lights ear warmer can also be used as a headband. I used pink and white for my background colors but you can easily use traditional Christmas red and green too. This is fun way to show you’re in the holiday spirit while you’re out and about this holiday season.
If you saw my Christmas Lights crochet stitch post, you already know how to make this stitch, and you also know this is an easy project. Most of the pattern is made up of half double crochets. But the Christmas lights themselves are made of double crochet 5 together (DC5Tog) stitches. If you’re unfamiliar with this stitch, it’s really very easy, I demonstrate how to make this stitch in the basic Christmas lights stitch video below.
Alright, let’s get started!
For this project you will need:
1. Yarn in at least 3 colors.
The amount of yarn colors you need, depends on how many different colored lights you want to have. I used 6 colors for my Crochet Christmas lights ear warmer. Two main background colors (pink and white), three colors for the lights (red, yellow, green), and one color for the cord/string (black).
I used peaches and cream yarn 100% cotton yarn for my sample. Although, I wouldn’t recommend this yarn for this project after having made it. I think a softer cotton, wool or acrylic yarn would have worked better. But, I still love how it turned out.
2. Crochet Hook
I used an H/8 5.00 mm crochet hook for the sample.
3. Scissors
4.Yarn needle
Crochet Christmas Lights Ear Warmer / Headband Pattern Instructions
For best results, you should measure around the head of the person you’re making this for using a fabric measuring tape. This way you can be sure that it will be a perfect fit. I made this to fit an adult head. This crochet pattern can be as long as you want just make sure your initial chain is a multiple of 3 plus 4.
For this ear warmer headband we’ll make 54 chains (a multiple of 3) plus 4 more to total 58 chains.
- Chain 58 with your border background color. I used pink.
- In the second stitch from the hook work your first half double crochet. (Please note we do not count the loop on the hook as a chain).
- Continue making half double crochets in every stitch down the row.
- Once you reach the end of the row chain 2 and turn your work.
- Loop in your background stripe color. I used white. In your first stitch make a half double crochet. Keep making half double crochets down the row. When you reach the end, chain 2 and turn your work.
- Loop in your background color (pink) again and in your first stitch make a half double crochet and keep making half double crochets down the row. When you reach the end, chain 2 and turn your work.
- Now in this row we’ll start making our Christmas lights. Make a half double crochet in the first stitch and again in the second stitch.
- Loop in your first color. In my example I used red. Cut the main color yarn (leaving a tail) and tie the tail of the first color with the main color tail in the back. Then make a double crochet 5 together in the next stitch with your first color.
- Cut the first color leaving a tail. Loop in the main color. Tie the first color with the main color in the back. In the next two stitches make a half double crochet in each stitch with the main color.
- Repeat steps 7-8, switching out colors until you reach the end of the row. You will end the row with your main color in the last two stitches. chain 2 and turn your work.
- Loop in your background color (pink) and make a half double crochet in each of the first two stitches.
- At the top of the Christmas lights you will only make one half double crochet. You will have to skip stitches. Make half double crochets in two stitches between the Christmas lights. Once you reach the end chain 2 and turn your work.
- Make another row of half double crochets with your same background color. Don’t put in your background stripe yet. It’s this extra row of the main background that helps center the pattern since the light cord will be backstitched in this area. When you reach the end of the row chain 2 and turn your work.
- Loop in the background stripe color (white). In your first stitch make a half double crochet. Keep making half double crochets down the row. When you reach the end, chain 2 and turn your work.
- Loop in your background color (pink) again and in your first stitch make a half double crochet and keep making half double crochets down the row. When you reach the end, chain 1 and fasten off.
- At this point you should tidy up the strings in the back. Tie everything securely then work the ends into your work.
- On the front of the headband, use a back stitch, weave your black yarn across the top of the Christmas lights in a wave, dipping at each light then back up again in between. This will make the cord for the lights.
- After you make your cord, use the black yarn to stitch back and forth on top of each light to make a rectangle for the light connector.
And that’s it! This pattern is really simple but using multiple colors makes it a little bit tricky. The end result is really adorable though!
Watch the video below for a step by step demonstration. If you’d like to watch the left handed version instead click here.


